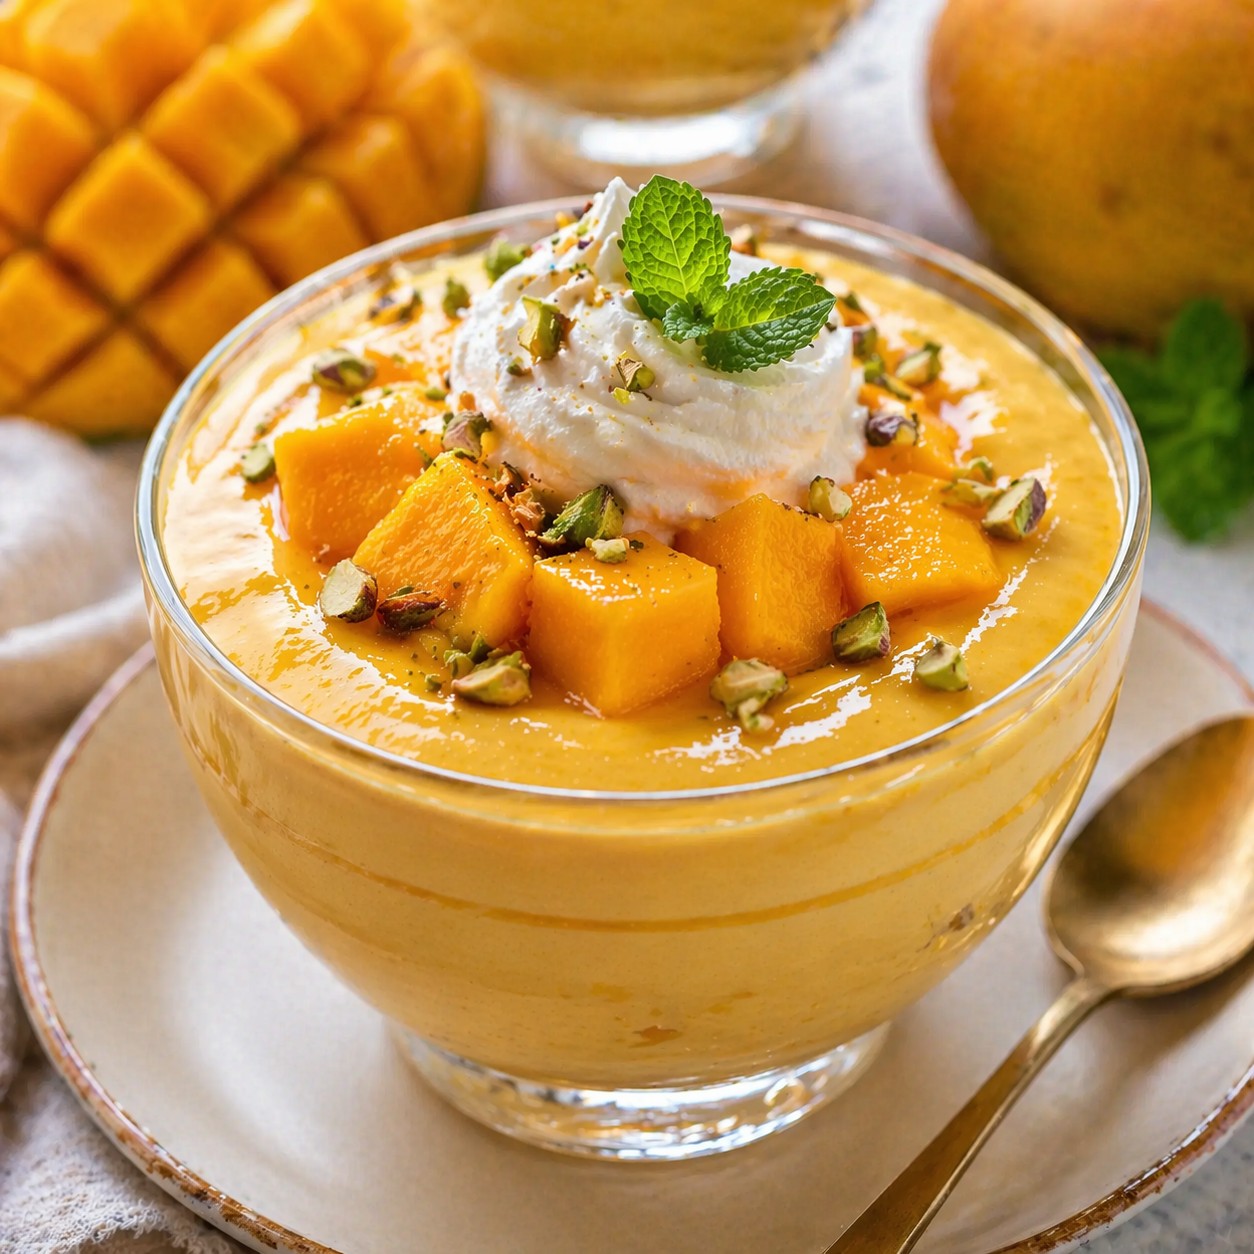
Creamy Mango Pudding
intro If you want a refreshing treat, this Creamy Mango Pudding Recipe is your best choice. It offers the perfect balance of sweetness and smooth texture. Furthermore, it is very simple to make at home with basic tools. Consequently, you will love serving this to your family on hot summer days. Therefore, gather your ingredients and prepare for a tropical delight.story Mangoes are widely known as the king of fruits. However, finding the right way to serve them can sometimes be tricky. Therefore, we created this guide to help you master the art of fruit desserts. This pudding captures the essence of summer in every bite. Additionally, it uses minimal ingredients to keep the flavor pure. Because of this simplicity, it remains a favorite for many home cooks around the world. Similarly, children adore the vibrant orange color and the velvet-like mouthfeel. Moreover, you can prepare this ahead of time for any party.cast 2 large ripe mangoes (peeled and cubed),1 cup whole milk,1/2 cup heavy cream,1/4 cup granulated sugar,1 tablespoon gelatin powder or agar-agar,3 tablespoons warm water,Fresh mint leaves for garnishsongs First, blend the mango cubes into a smooth puree using a high-speed blender. Additionally, strain the pulp to remove any fibers.,Second, mix the gelatin with warm water in a small bowl. Therefore, it will bloom and dissolve properly.,Third, combine the milk, heavy cream, and sugar in a saucepan over medium heat. However, do not let the mixture boil.,Next, stir the bloomed gelatin into the warm milk mixture until it disappears completely. Furthermore, ensure no lumps remain.,Then, whisk the mango puree into the cream mixture slowly. Consequently, the color will turn into a beautiful bright yellow.,Finally, pour the liquid into individual glass bowls. Place them in the refrigerator for at least four hours. Moreover, you should let them set overnight for the best results.about Making a Masterpiece with the Creamy Mango Pudding Recipe. This section explains why the texture is so important for a good dessert. First, always choose the ripest mangoes you can find. Consequently, the natural sugars will reduce the need for extra sweeteners. Furthermore, the fat content in the heavy cream provides that signature silkiness. However, you can substitute coconut milk for a vegan twist. Therefore, this recipe is quite versatile for different dietary needs. Additionally, the chilling process allows the flavors to meld together perfectly. Thus, patience is the most important ingredient in this process.themes Always use room temperature mangoes for easier blending. Therefore, the puree remains smooth.,If the pudding is too soft, add a bit more gelatin next time. However, do not add too much or it becomes rubbery.,Furthermore, you can add diced mango pieces at the bottom of the bowl for a surprise texture.,Store the pudding in an airtight container. Consequently, it will stay fresh for up to three days.,Garnish with mint or berries right before serving. Similarly, a splash of lime juice can enhance the tropical notes.whyWatch You should try this Creamy Mango Pudding Recipe because it is incredibly cooling and delicious. Furthermore, it requires no baking and minimal effort. Therefore, it is the ideal solution for busy weeknights. Additionally, the vibrant look makes it look like a gourmet dish. Consequently, your guests will be very impressed by your culinary skills. Finally, it uses fresh fruit which provides a boost of vitamins. Because it is so easy, you can even make it with your kids for a fun afternoon activity.