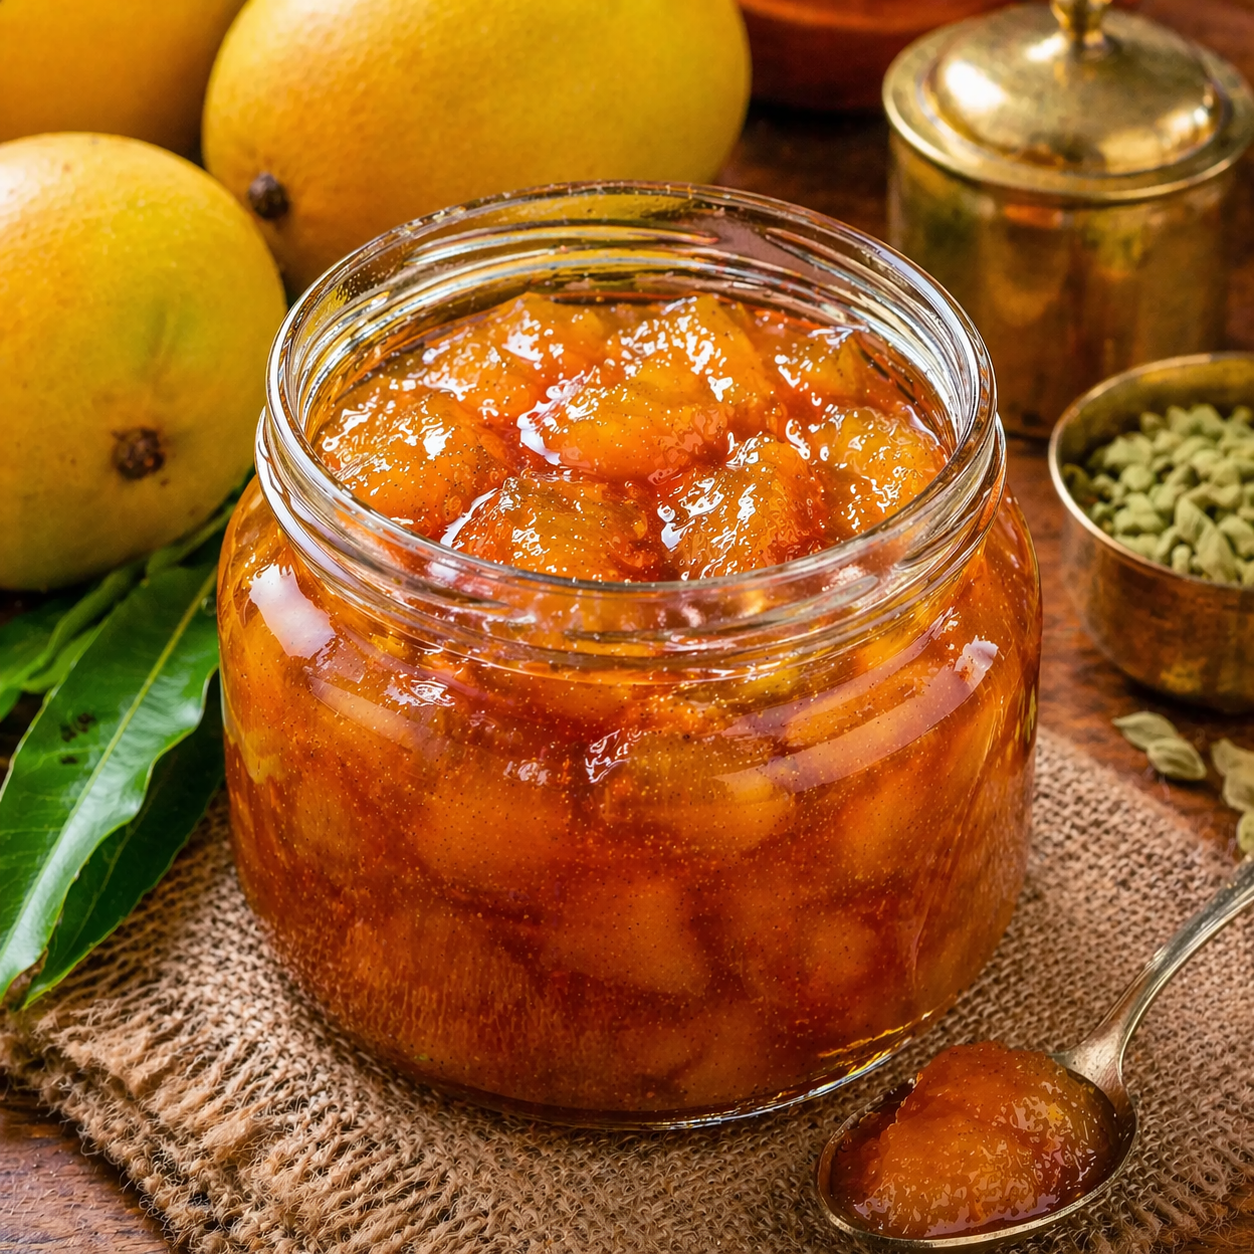
Edit Template

Recipe Tag: Kid-friendly

Mango Jam

intro Making a delicious Mango Jam Recipe at home is easier than you think. You can enjoy the bright taste of summer throughout the whole year with this simple method. story Many people love the taste of tropical fruits in the morning. Therefore, you should learn how to make this Mango Jam Recipe. First, you need fresh mangoes that are very ripe. Ripe fruit provides the best natural sugar for your preserves. Consequently, your jam will taste much better than any store-bought versions. Additionally, you can control the amount of sugar you add to the pot. This makes the recipe healthier for your family and friends. Furthermore, the vibrant orange color of the mango makes your breakfast table look beautiful and inviting. However, you must be careful not to overcook the mixture during the final stages. ### Preparing Your Mango Jam Recipe to Perfection Second, you must prepare your ingredients properly before starting the stove. Peel the mangoes carefully because the skin is tough and bitter. After that, chop the golden flesh into small cubes or thin slices. You can also mash them with a fork if you prefer a smoother texture. Moreover, adding a splash of lime juice helps the jam set perfectly on the shelf. Because lime contains natural pectin, it creates a thick and spreadable consistency. Consequently, you do not need to buy artificial thickeners or chemicals. Therefore, your jam remains pure, natural, and full of flavor. Finally, stir the pot constantly so the bottom does not burn or stick. This ensures a golden, smooth spread every single time. Ingredients 4 cups ripe mango pulp,2 cups granulated sugar,2 tablespoons fresh lime juice,A pinch of saltsongs First, peel and dice the mangoes into very small pieces.,Next, combine the mango pulp and sugar in a heavy-bottomed pot.,Stir the mixture over medium heat until the sugar dissolves completely.,Then, add the lime juice and simmer for 20 to 25 minutes.,Finally, check the consistency and pour the hot jam into sterilized glass jars.about This Mango Jam Recipe focuses on simplicity and pure fruit flavor. It avoids all artificial preservatives and unnecessary colors. Furthermore, the natural pectin in the lime juice ensures a perfect set for your toast. You will love how the bright, tangy flavor pairs perfectly with fresh bread or creamy yogurt. Additionally, this jam makes a wonderful handmade gift for your neighbors. Because it uses fresh fruit, every jar captures the true essence of the tropics. You can store these jars for several months in a cool place. Therefore, you can have a tropical treat even during the winter.themes Use only fully ripe mangoes for the best natural sweetness.,Sterilize your glass jars to ensure a long and safe shelf life.,Keep the heat at a medium-low level to avoid scorching the fruit.,Store the finished jam in a cool, dark place for maximum freshness.whyWatch You should try this recipe because it transforms simple ingredients into a gourmet spread. It is cost-effective and much tastier than commercial brands. Therefore, your breakfast will never be boring again! Give it a try today and taste the difference of homemade quality.

Read More »

banana Fritters

intro Looking for a sweet treat to brighten your morning? This banana Fritters Recipe offers the perfect solution for your overripe fruit. Furthermore, it takes less than twenty minutes to prepare from start to finish. Consequently, you can enjoy a warm snack whenever cravings hit. Therefore, gather your ingredients and let us start cooking this delicious dish right now.story Banana fritters remind me of lazy Sunday mornings at home. My mother always used the darkest bananas because they provided the most natural sugar. Additionally, she added a pinch of nutmeg for extra warmth. Therefore, the entire kitchen felt cozy and inviting. However, the best part was always the crispy edge of each fritter. Because we ate them hot, the centers stayed soft and creamy. Consequently, these fritters became a family tradition that everyone requested for birthdays. Furthermore, they are the best way to avoid food waste in your kitchen. You will surely love how simple and rewarding this cooking process feels.cast To make this recipe, you will need three large ripe bananas. Additionally, prepare one cup of all-purpose flour and two tablespoons of sugar. You must also include one teaspoon of baking powder and a half teaspoon of cinnamon for flavor. Furthermore, have one-quarter cup of milk and oil for frying ready on your counter.songs First, peel and mash your bananas in a large mixing bowl. Next, add the sugar, cinnamon, and milk to the fruit mash. Consequently, the mixture should look smooth but still slightly chunky. Then, whisk in the flour and baking powder until a thick batter forms. Therefore, you are now ready to fry. Heat oil in a skillet over medium heat. Carefully drop spoonfuls of batter into the hot oil. Furthermore, fry each side until it turns a deep golden brown. Finally, drain them on paper towels and serve them while they are hot.about Why the banana Fritters Recipe Works Every Time. This banana Fritters Recipe has roots in many tropical regions across the globe. For instance, many Caribbean islands serve them as a popular side dish. Additionally, Southeast Asian countries have their own unique versions of this snack. Because bananas grow abundantly in these climates, people invented creative ways to cook them. Therefore, this recipe connects you to a rich global culinary history. Moreover, it shows how simple ingredients can create very complex and satisfying flavors.themes Use bananas with many brown spots because they are much sweeter. However, do not use mushy fruit that has turned completely black inside. Additionally, ensure your oil is hot enough before you start frying. If the oil is cold, the fritters will soak up too much grease. Therefore, test a small drop of batter first to see if it sizzles. Furthermore, you can sprinkle powdered sugar on top for a beautiful finish. Consequently, your guests will be very impressed with your presentation.whyWatch You should try this recipe because it is incredibly budget-friendly for any family. Additionally, it requires minimal equipment and basic pantry staples. Therefore, even beginners can achieve great results on their first try. Furthermore, the taste is far superior to any store-bought snacks you might find. Consequently, you will save money while eating much better food.

Read More »

Poori

intro Poori is a beloved fried bread that originated in the Indian subcontinent. Furthermore, this Poori Recipe helps you create light and airy rounds that melt in your mouth. Families often enjoy these golden treats during festive mornings or weekend breakfasts. Additionally, you can serve them with a variety of side dishes like spicy potato curry or sweet shrikhand. Therefore, learning this simple technique will surely impress your guests and satisfy your cravings. story For generations, Indian households have cherished the tradition of making fresh bread. Many children remember waking up to the sound of sizzling oil in the kitchen. Consequently, a hot plate of fried dough became the symbol of a happy Sunday. However, achieving that perfect, balloon-like puff requires a bit of skill. Additionally, every region has its own minor variations in flour or thickness. For instance, some cooks add a bit of semolina for extra crunch. Therefore, this bread remains a timeless staple that brings people together across different cultures. Ingredients 1. 2 cups Whole wheat flour (Atta) 2. 1 tablespoon Semolina (Suji) for a crispy texture 3. 1/2 teaspoon Salt 4. 1 teaspoon Vegetable oil for the dough 5. 3/4 cup Lukewarm water (adjust as needed) 6. Vegetable oil for deep frying. steps 1. First, combine the whole wheat flour, salt, and semolina in a large mixing bowl. 2. Add one teaspoon of oil and mix it into the flour with your fingertips. Furthermore, ensure the oil is evenly distributed. 3. Pour water gradually and begin kneading the mixture. Consequently, you will form a stiff and smooth dough. 4. However, do not add too much water at once, as the dough must remain firm. 5. Cover the dough with a damp cloth and let it rest for 15 minutes. 6. Next, divide the dough into small, lemon-sized balls. 7. Grease your rolling pin with a drop of oil to prevent sticking. Additionally, avoid using dry flour for dusting if possible. 8. Roll each ball into an even circle of medium thickness. 9. Heat the frying oil in a deep pan over medium-high heat. Therefore, check the heat by dropping a tiny piece of dough into it. 10. Carefully slide the rolled dough into the hot oil. Furthermore, gently press the top with a slotted spoon to help it puff. 11. Flip the poori once it expands and fry until it turns golden brown on both sides. about The Magic of a Perfect Poori Recipe depends entirely on the temperature of the oil and the consistency of the dough. This Poori Recipe focuses on achieving a balance between a soft interior and a slightly crisp exterior. Because it uses whole wheat flour, it provides a hearty flavor that pairs well with savory and sweet toppings. Additionally, the inclusion of semolina ensures that the bread stays puffy for a longer time after frying. Furthermore, the absence of leavening agents like yeast makes it a quick option for busy mornings.themes You should always ensure the oil is sufficiently hot before frying. If the oil is too cold, the bread will absorb excessive grease and fail to puff. Consequently, the texture will become heavy rather than light. Additionally, knead a stiff dough rather than a soft one. Furthermore, roll the dough with even pressure to avoid thin spots. However, do not rest the rolled circles for too long; instead, fry them immediately to get the best rise. Therefore, following these small details will result in professional-quality results every time.whyWatch You should try this Poori Recipe because it is incredibly rewarding and fast. Moreover, it uses simple pantry staples that you likely already have. Therefore, it is the ultimate comfort food for your family. Additionally, the process of watching the dough transform into a golden balloon is truly satisfying. Consequently, you will master a skill that brings authentic flavor to your dining table.

Read More »
కావలసిన పదార్ధాలు
  • మామిడి తురుము Grated Mango (Raw or semi-ripe) 2 cups
  • పంచదార Sugar 1.5 cups
  • యాలకుల పొడి Cardamom Powder 1 teaspoon
  • కుంకుమపువ్వు Saffron (Optional) 1/2 teaspoon
  • నిమ్మరసం Lemon Juice 1 teaspoon
  • దాల్చిన చెక్క పొడి Cinnamon Powder 1/2 teaspoon
తయారి విధానం
  1. మామిడికాయలను కడిగి, పీల్ తీసి, మధ్యస్థంగా ఉండే గ్రేటర్ తో తురుముకోవాలి.
    Wash and peel the raw mangoes, then grate them using a medium-sized grater.
  2. ఒక మందపాటి బాణలిలో మామిడి తురుము మరియు పంచదార వేసి కలపాలి.
    In a heavy-bottomed pan, combine the grated mango and sugar thoroughly.
  3. స్టౌ మీద తక్కువ మంటపై ఉంచి, పంచదార పూర్తిగా కరిగే వరకు కలుపుతూ ఉండాలి.
    Place the pan on low flame and stir continuously until the sugar melts completely.
  4. పంచదార కరిగిన తర్వాత మధ్యస్థ మంటపై అప్పుడప్పుడు కలుపుతూ అడుగు అంటకుండా ఉడికించాలి.
    Cook the mixture on medium flame while stirring occasionally to prevent sticking to the bottom.
  5. మిశ్రమం తీగ పాకం వచ్చే వరకు (వేళ్ల మధ్య చూస్తే ఒక తీగలా రావాలి) ఉడికించిన తర్వాత యాలకుల పొడి మరియు దాల్చిన చెక్క పొడి కలపాలి.
    Once the mixture reaches a one-string consistency (the syrup forms a thin string between your thumb and forefinger), add the cardamom powder and cinnamon powder.
  6. మంచి రంగు మరియు సువాసన కోసం కుంకుమపువ్వును కూడా వేసుకోవచ్చు.
    Stir in the saffron strands if you are using them for a rich aroma and natural color.
  7. పంచదార గడ్డకట్టకుండా ఉండటానికి మరియు కొంచెం పులుపు కోసం నిమ్మరసం కలపాలి.
    Add lemon juice to prevent the sugar from crystallizing and to provide a slight tangy balance.
  8. మురబ్బా చిక్కగా మరియు మెరుస్తూ కనిపించే వరకు మరో 2 నిమిషాలు ఉడికించాలి.
    Continue to cook for another 2 minutes until the jam thickens and looks glossy.
  9. స్టౌ కట్టేసి, గది ఉష్ణోగ్రత వద్ద మురబ్బాని పూర్తిగా చల్లారనివ్వాలి.
    Turn off the heat and let the murabba cool down completely at room temperature.
  10. ఈ మామిడికాయ మురబ్బాని శుభ్రమైన మరియు పొడి గ్లాసు జార్‌లో భద్రపరుచుకుంటే ఎక్కువ కాలం నిల్వ ఉంటుంది.
    Store the Mango Murabba in a clean, dry glass jar for a long shelf life.
[real3dflipbook id='1']