Edit Template

Recipe Tag: Quick

Rava Dosa

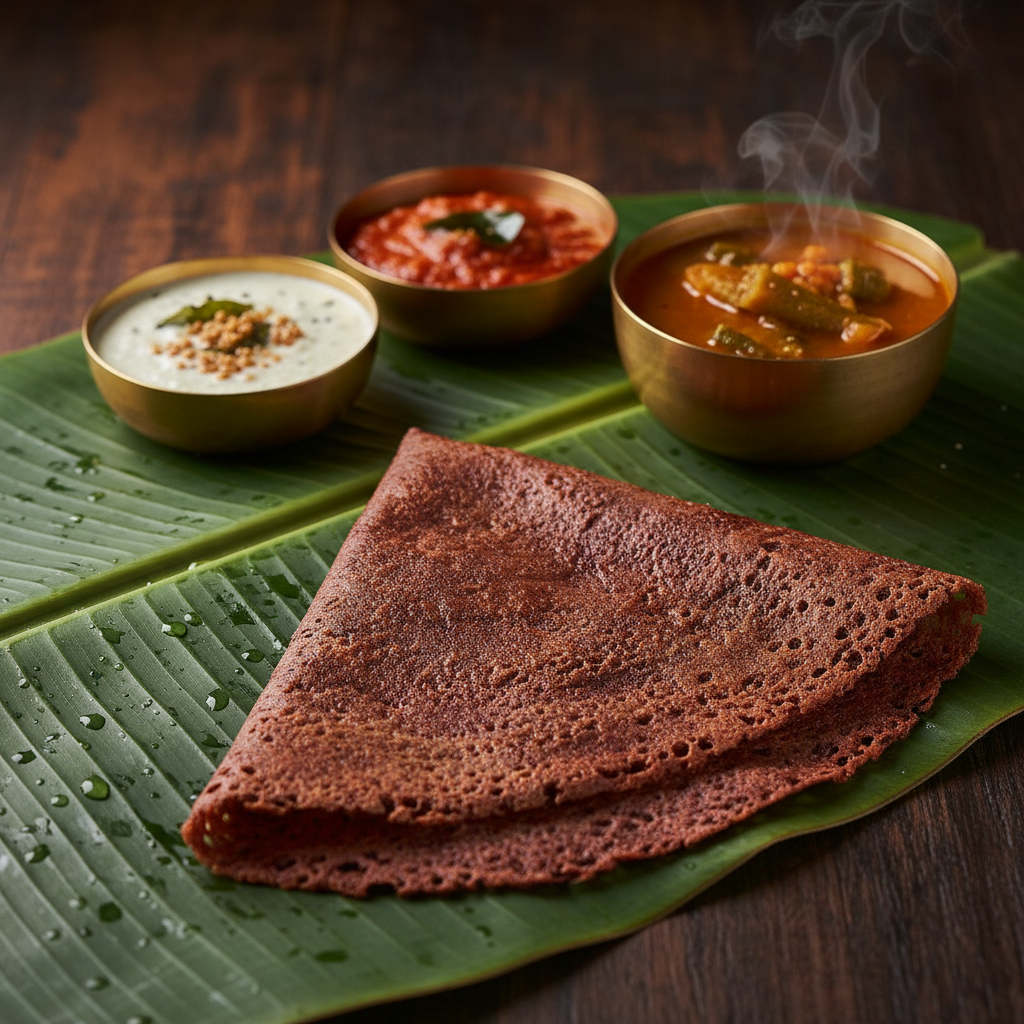
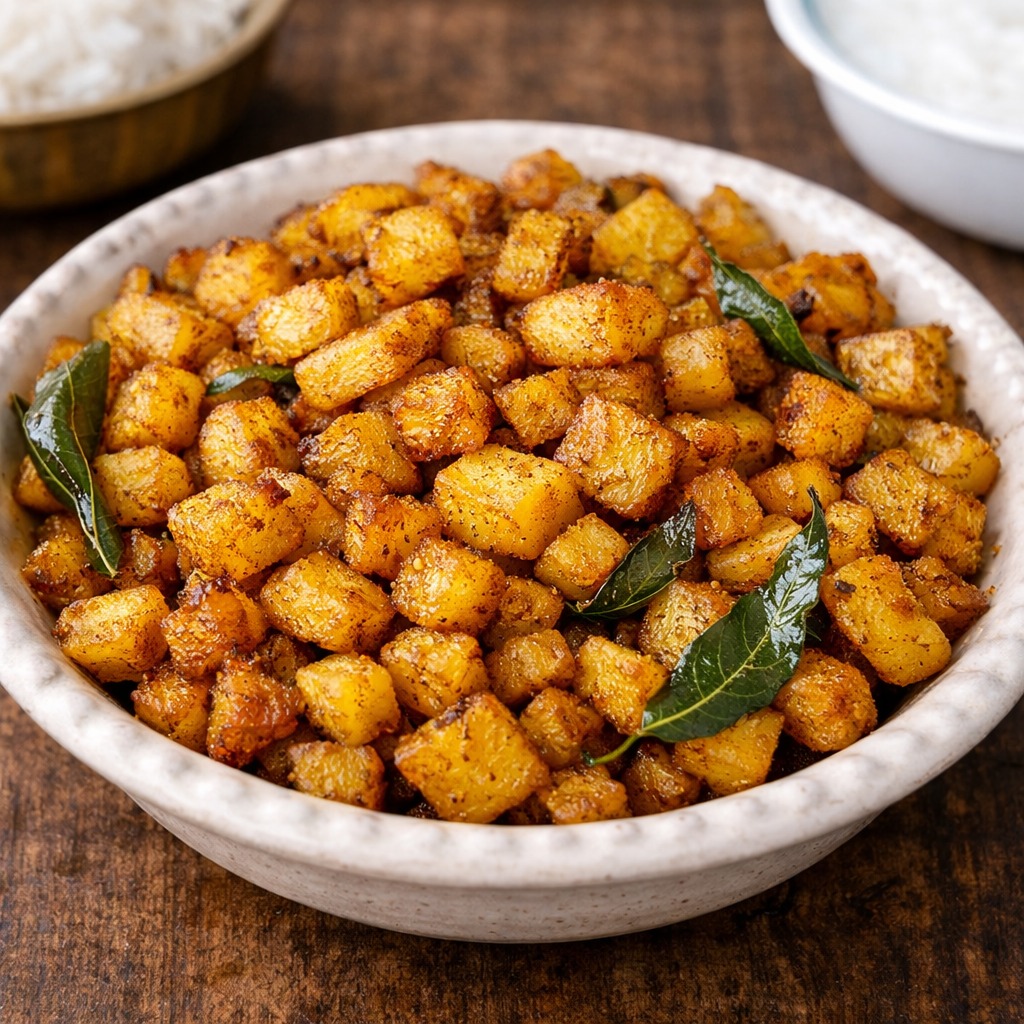
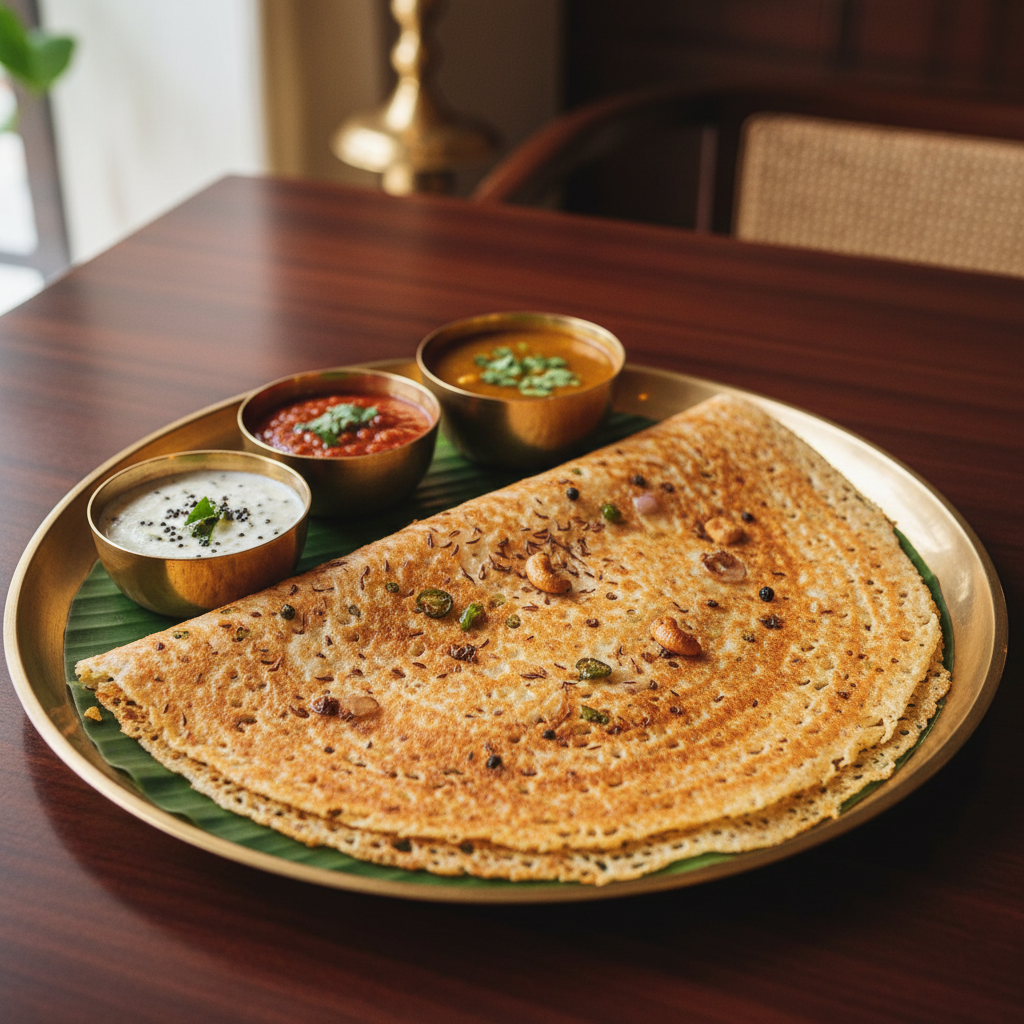
intro Welcome to the ultimate guide for a perfect South Indian breakfast. This Rava Dosa Recipe helps you make thin, lacy, and extremely crispy dosas in just a few minutes. Unlike traditional dosa, there is no need to ferment the batter overnight. It works perfectly for busy mornings or sudden hunger cravings. The texture of this crepe is unique and deeply satisfying for anyone who enjoys a good crunch. story Everyone loves a good crunch at the start of the day. Rava Dosa is a beloved staple in many Indian households because of its simplicity. It uses semolina (rava) and rice flour to create that signature net-like appearance. Historically, this version was developed to skip the long fermentation process of rice and lentils. Over time, it became a popular street food across India. Many families enjoy it with spicy coconut chutney or savory potato masala. The real secret lies in the batter consistency and pan temperature. When these are just right, the dosa turns perfectly crisp with beautiful lace-like holes. Ingredients Fine semolina (rava), rice flour, and all-purpose flour form the base of this recipe. Water is added to achieve a thin, flowing consistency. Cumin seeds, finely chopped ginger, green chilies, and torn curry leaves bring in aroma and flavor, while salt balances the taste. Oil or ghee is used for frying to get that crisp texture. Finely chopped onions can also be added optionally for extra flavor. preparation Start by mixing semolina, rice flour, and all-purpose flour in a bowl. Add cumin seeds, ginger, green chilies, curry leaves, and salt. Gradually pour in water while whisking to avoid lumps, keeping the batter thin like buttermilk. Let it rest for about 20 to 25 minutes, then adjust the consistency if needed. Heat a pan until very hot, stir the batter, and pour it from the edges toward the center without spreading. Drizzle oil or ghee, cook until golden and crisp, then lift and serve hot. about Mastering the Rava Dosa Recipe:This dish is a quick variation of the classic Indian crepe. Unlike traditional dosa, it uses simple pantry ingredients without soaking or grinding. The most important factor is the water-to-flour ratio. A thin batter creates the iconic holes and crispy texture, while a thick batter results in a soft dosa. Using a heavy pan ensures even heat distribution and prevents burning. Many prefer a cast-iron skillet for consistent results and better flavor. themes Pro Tips for the Perfect Crunch :Always ensure the pan is very hot before pouring the batter. A cold pan will cause sticking and ruin the texture. Stir the batter before each dosa since the flour settles at the bottom. You can sprinkle finely chopped onions on the pan for added flavor. Adding a little sour curd gives a mild tang, while ghee enhances aroma and richness. For extra spice, increase green chilies or add crushed black pepper. Why try You should try this Rava Dosa Recipe because it saves time without compromising on authentic taste. The crisp texture makes it a favorite for both kids and adults. It is light, easy to digest, and perfect for any time of the day. Start cooking and enjoy this crunchy delight with your family.

Read More »

Ragi Dosa

intro If you want a healthy start to your day, this Ragi Dosa Recipe is the perfect choice for you. Many people love this dish because it combines health with amazing taste. Additionally, it takes very little time to prepare. Consequently, you can enjoy a nutritious meal even on busy mornings without any stress. You will find that this dish keeps you energized for a long time.story/description Ragi, also known as finger millet, has been a staple in Indian households for centuries. Traditionally, mothers served it to children to ensure they developed strong bones. Furthermore, this recipe modernizes that tradition by turning the humble flour into a crispy, savory crepe. Because it is naturally gluten-free, it appeals to health enthusiasts everywhere. Moreover, its earthy flavor pairs beautifully with spicy coconut chutneys or tangy sambar. It truly offers a rustic charm that few other breakfast items can match.cast/ingredients To prepare this dish, you will need 1 cup of Ragi flour and 1/2 cup of Rice flour. Additionally, gather 1/4 cup of fresh Curd (Yogurt) and 2 cups of water. For flavor, include 1 chopped green chili, 1 teaspoon of cumin seeds, and salt to taste. Finally, keep some oil or ghee ready for frying the dosas on the pan.songs/steps First, whisk the ragi flour and rice flour in a large mixing bowl. Next, add the curd and water slowly to create a thin, watery batter. Then, mix in the green chilies, cumin seeds, and salt thoroughly. After that, heat a non-stick tawa on a medium-high flame. Pour the batter from the outer edges toward the center to create a lacy pattern. Additionally, drizzle a little oil around the edges for extra crispiness. Finally, cook until the bottom turns golden brown and serve it hot with your favorite side dish.about This dish represents the best of South Indian home cooking. It offers a low-glycemic index alternative to regular rice-based dosas. Furthermore, the high calcium and iron content makes it a powerhouse of nutrition for all ages. Therefore, many doctors recommend including it in a balanced diet. It is not just a meal; it is a lifestyle choice for those who value their health.themes/tips To get the best results from your Ragi Dosa Recipe, always ensure the batter remains very thin. If the batter becomes too thick, the dosa will become chewy rather than crispy. Additionally, allow the batter to rest for ten minutes before cooking. Consequently, the flour absorbs the water better and creates a smoother texture. Moreover, use a well-seasoned cast-iron skillet to achieve the perfect crunch. Always stir the batter before making each new dosa because the flour tends to settle at the bottom.whyWatch/whyTry You should try this recipe because it saves time and boosts your daily energy levels. Furthermore, it keeps you full for longer periods due to its high fiber content. Consequently, you will avoid unhealthy snacking during the afternoon. If you want a guilt-free meal that tastes delicious, this is the one for you. Additionally, it is a great way to introduce millets into your family’s diet in a way they will actually enjoy.

Read More »

Sanna Kaarapoosa

intro Making the perfect Sanna Kaarapoosa Recipe at home brings a delightful crunch to your tea time. Furthermore, this traditional South Indian snack is quite simple to prepare with just a few pantry staples. Consequently, many families make large batches during festivals like Diwali. However, you must follow specific steps to get that thin, crispy texture.story Sanna Kaarapoosa is a very thin, noodle-like snack that tastes delicious. It primarily uses besan and rice flour for that signature crispness. Additionally, the spice level depends on your personal preference for red chili powder. Therefore, you can customize it for children or adults. Many people enjoy it with hot tea. Specifically, the name ‘Sanna’ refers to the thinness of the strands.cast 2 cups Gram Flour (Besan), 1 cup Rice Flour, 2 tsp Red Chili Powder, 1 tsp Salt, 1/2 tsp Ajwain (Carom seeds), 2 tbsp Hot Oil, Oil for deep frying, Water as needed.songs 1. Initially, sift the gram flour and rice flour together in a large bowl. 2. Add the red chili powder, salt, and ajwain to the mixture. 3. Pour two tablespoons of hot oil over the flour to ensure crispness. 4. Gradually add water and knead it into a soft, smooth dough. 5. Meanwhile, heat oil in a deep frying pan on medium heat. 6. Place a portion of the dough into the Murukku maker using the small-hole plate. 7. Press the maker in a circular motion directly over the hot oil. 8. Fry the strands until they turn light golden brown. 9. Finally, remove the kaarapoosa and drain the excess oil on a paper towel.about ## Mastering the Sanna Kaarapoosa Recipe Initially, you need a special kitchen tool called a ‘Murukku maker’ with the finest hole plate. This tool allows the dough to flow in thin strands into the hot oil. Moreover, using high-quality oil ensures a long shelf life. Although it looks complex, the process is actually very fast. Therefore, you can prepare this snack in less than thirty minutes without much effort.themes ## Secrets of the Sanna Kaarapoosa Recipe To get the best texture, ensure you add hot oil to the dough before kneading. Similarly, do not over-knead the dough, or the snack might become hard. Furthermore, store it in an airtight container once it cools down completely. Consequently, the snack stays fresh for weeks. Always fry on medium heat so it cooks evenly and remains golden.whyWatch You should try this recipe because it is healthier than store-bought snacks. Additionally, the flavor of homemade kaarapoosa is unmatched. Finally, your family will love the crispy texture and savory taste of this traditional treat. It makes every tea break special.

Read More »

Potato Fry

intro Everyone loves a good Potato Fry Recipe because it brings comfort to any meal. This dish transforms simple tubers into golden, crispy delights. Therefore, you should learn this easy method to upgrade your dinner game instantly. Many families enjoy this dish alongside rice or flatbreads for a complete experience. story/description Potatoes are the world’s most versatile vegetable. Furthermore, they absorb spices beautifully while maintaining a soft interior. This recipe focuses on getting that perfect crunch without deep frying. Consequently, you save time and oil while preparing a healthier version. However, the flavor remains intense and satisfying. You will find that simple ingredients often produce the best results in the kitchen. Additionally, this dish works for any meal of the day, including breakfast.cast/ingredients To begin, gather three large potatoes, peeled and cubed into small pieces. You will also need two tablespoons of cooking oil and one teaspoon of cumin seeds. Additionally, prepare one-half teaspoon of turmeric powder and one teaspoon of red chili powder. Finally, keep salt to taste and fresh cilantro for a bright garnish.songs/steps First, heat the oil in a large pan over medium heat. Next, add the cumin seeds until they begin to sizzle. Furthermore, add the potato cubes and turmeric powder to the pan. Stir them well so the oil coats every single piece. Subsequently, cover the pan for five minutes to soften the potatoes. After that, remove the lid and increase the heat slightly. Sprinkle the chili powder and salt over the potatoes. Consequently, sauté them until they turn golden brown and crispy. Finally, garnish with fresh cilantro and serve the dish while it is hot.about ## Mastering the Crispy Potato Fry Recipe This dish is a staple in many households across the globe. Additionally, it pairs perfectly with lentils, yogurt, or even simple sandwiches. Because it requires minimal ingredients, it is a budget-friendly option for everyone. Furthermore, the preparation takes less than twenty minutes from start to finish. Therefore, it is ideal for busy weeknights when you need a quick side dish. You can serve it as a snack or a main course accompaniment. Most people find the texture irresistible when cooked correctly.themes/tips ## Why This Potato Fry Recipe Works Use starchy potatoes like Russets for the best crunch. Additionally, do not crowd the pan during the cooking process; otherwise, the potatoes will steam instead of fry. Furthermore, soak the cut potatoes in cold water first. Consequently, you remove excess starch, which helps with the final crisping. However, ensure you dry them thoroughly before adding them to the hot oil. You might also add a pinch of garlic powder for extra depth. Consequently, your kitchen will smell amazing as the potatoes brown.whyWatch/whyTry You should try this Potato Fry Recipe because it is incredibly versatile and easy to master. Moreover, children and adults alike adore the salty, crispy flavor of well-seasoned potatoes. Additionally, you can customize the spices to suit your personal preference. Therefore, this Potato Fry Recipe will likely become a recurring favorite in your kitchen rotation. Start cooking now and enjoy a plate of crispy goodness!

Read More »
కావలసిన పదార్ధాలు
  • బొంబాయి రవ్వ Semolina (Bombay Rava) 1 cup
  • బియ్యం పిండి Rice flour 1 cup
  • మైదా పిండి All-purpose flour (Maida) 1/2 cup
  • పెరుగు Yogurt (Curd) 1/2 cup
  • నీరు Water (Adjust for consistency) 2 1/2 cups
  • జీలకర్ర Cumin seeds 1 tsp
  • మిరియాల పొడి Black pepper powder (coarsely crushed) 1 tsp
  • అల్లం ముక్క Ginger (finely chopped) 1 inch
  • ఉల్లిపాయ ముక్కలు Onion (finely chopped) 1/4 cup
  • కొత్తిమీర Coriander leaves (finely chopped) 1/4 cup
  • కరివేపాకు Curry leaves (torn into pieces) 1 రెమ్మ
  • ఉప్పు Salt To taste
  • నూనె Oil (for Drizzling) As needed
తయారి విధానం
  1. ఒక వెడల్పాటి గిన్నెలో బొంబాయి రవ్వ, బియ్యం పిండి, మైదా పిండి మరియు ఉప్పు వేసి బాగా కలపండి.
    In a large mixing bowl, combine semolina (rava), rice flour, all-purpose flour (maida), and salt.
  2. ఇందులో పెరుగు మరియు నీరు పోసి ఎక్కడా ఉండలు లేకుండా పల్చగా (మజ్జిగలా) కలుపుకోవాలి.
    Add yogurt and water gradually, whisking thoroughly to ensure there are no lumps; the consistency should be very thin, similar to buttermilk.
  3. ఇప్పుడు జీలకర్ర, మిరియాల పొడి, అల్లం, పచ్చిమిర్చి, ఉల్లిపాయలు, కొత్తిమీర మరియు కరివేపాకు వేసి కలపండి.
    Stir in the cumin seeds, crushed black pepper, finely chopped ginger, green chilies, onions, coriander leaves, and curry leaves.
  4. ఈ మిశ్రమాన్ని కనీసం 15 నుండి 20 నిమిషాల పాటు పక్కన పెట్టండి. ఇలా చేయడం వల్ల రవ్వ నీటిని పీల్చుకుని సాఫ్ట్ గా అవుతుంది.
    Let the batter rest for 15 to 20 minutes to allow the semolina to absorb moisture and soften.
  5. దోశ వేసే ముందు పిండిని ఒకసారి కలపండి; పిండి చిక్కగా అనిపిస్తే మరికొన్ని నీళ్లు పోయండి. పిండి నీళ్లలా ఉండాలి.
    After resting, check the consistency again. If the batter has thickened, add a little more water to maintain the thin texture.
  6. స్టవ్ మీద నాన్-స్టిక్ పెనం పెట్టి బాగా వేడి చేయండి. పెనం బాగా వేడిగా ఉంటేనే దోశకు రంధ్రాలు (Lacy texture) వస్తాయి.
    Heat a non-stick tawa or griddle on medium-high heat until it is smoking hot.
  7. పెనం వేడెక్కాక, గరిటెతో పిండిని అంచుల నుండి మధ్యలోకి జల్లుతున్నట్లుగా వేయండి (సాధారణ దోశలా గరిటెతో రుద్దకూడదు).
    Once the tawa is hot, pour the batter starting from the edges toward the center in a splashing motion (do not spread it with the back of a ladle like a regular dosa).
  8. దోశ చుట్టూ మరియు మధ్యలో ఉన్న రంధ్రాలలో కొంచెం నూనె వేసి, దోశ ఎర్రగా కాలే వరకు మధ్యస్థ మంట మీద వేయించండి.
    Drizzle oil around the edges and into the small holes of the dosa. Cook on medium flame until it turns golden brown and crisp.
  9. దోశ క్రిస్పీగా మారి అంచులు విడిపోతున్నప్పుడు జాగ్రత్తగా తీసి అల్లం పచ్చడి లేదా కొబ్బరి పచ్చడితో వేడిగా వడ్డించండి.
    Carefully lift the dosa from the tawa once the edges start to lift. Serve immediately while hot with ginger chutney or coconut chutney.
[real3dflipbook id='1']