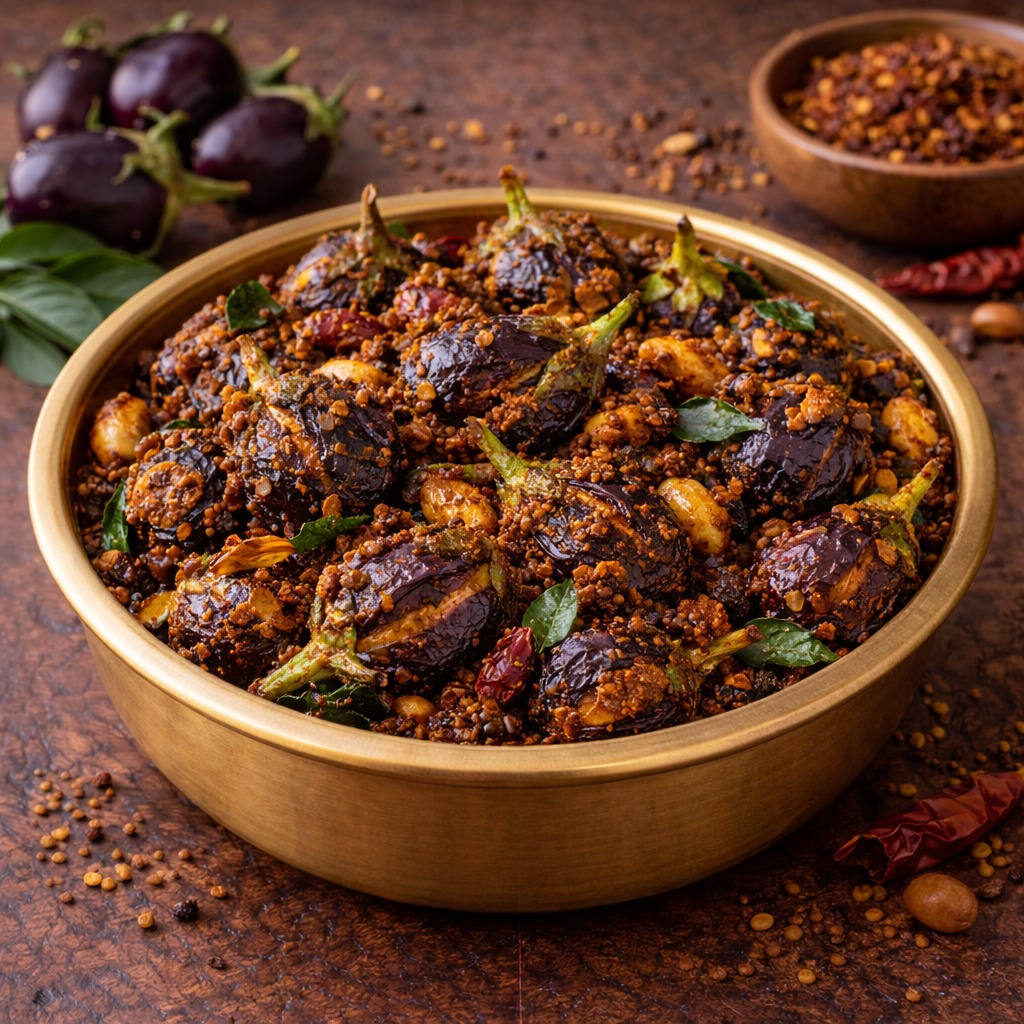
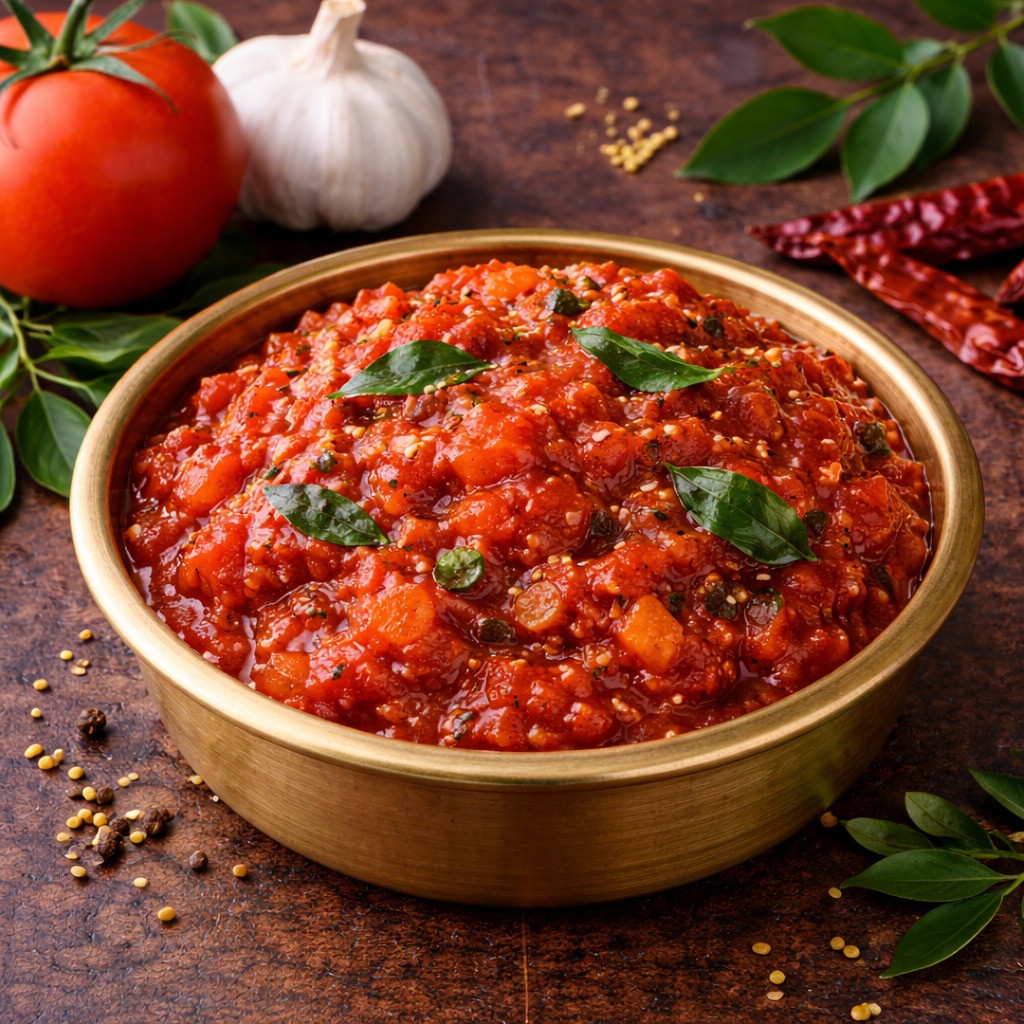
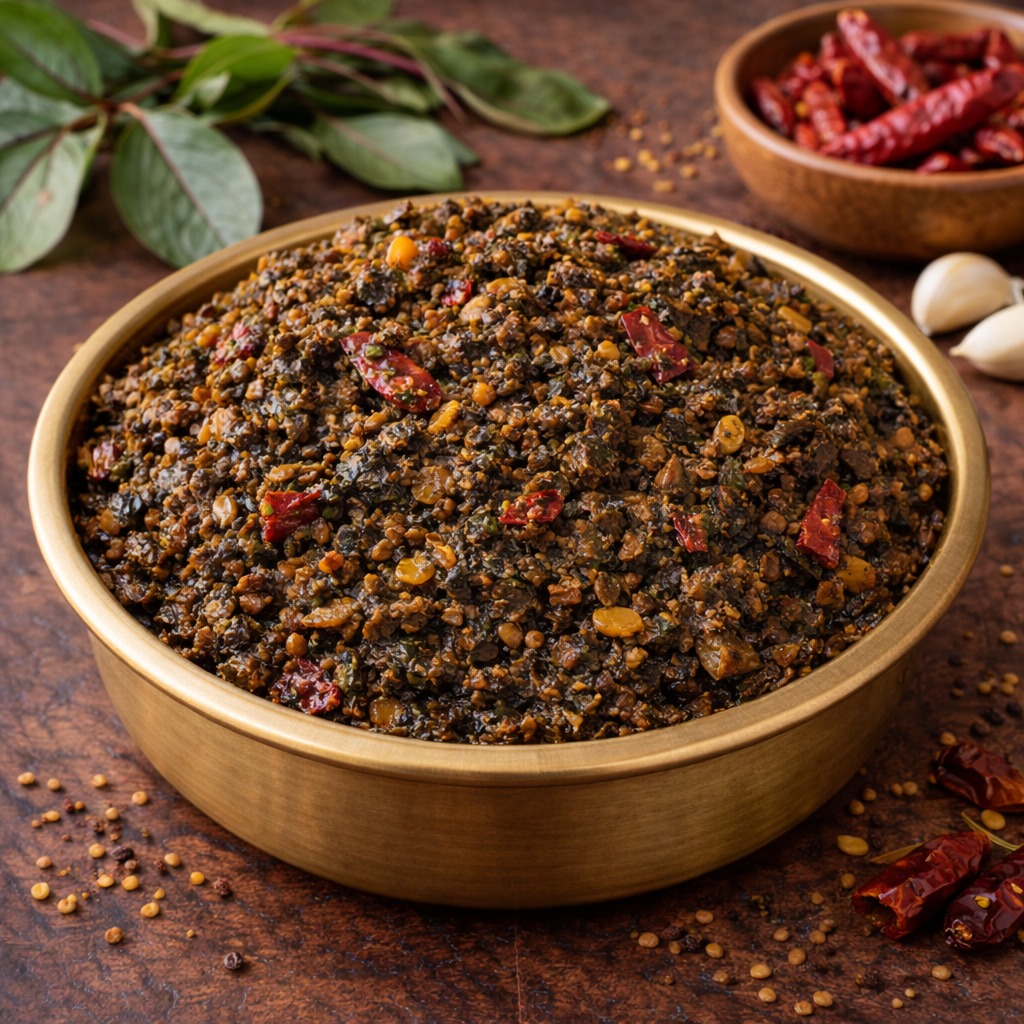
Edit Template

Recipe Tag: Traditional

Red Chilli Pickle

intro The Red Chilli Pickle Recipe brings a vibrant kick to your dinner table. Consequently, this spicy condiment pairs beautifully with parathas and dal rice. Although it seems complex, you can easily master this art at home. Furthermore, the aroma of roasted spices will fill your kitchen instantly. Additionally, making it yourself ensures you use the best quality oil. Therefore, you avoid the hidden chemicals found in store-bought jars. You will love how it transforms your meals.story/description Historically, this pickle represents the heart of Indian culinary traditions. Therefore, families prepare large batches every winter to last all year. Specifically, the thick-skinned red chillies work best for stuffing because they hold the masala well. Moreover, the natural tanginess from amchur or lemon juice balances the intense heat. Consequently, every bite offers a complex flavor profile that dances on your tongue. Because this recipe relies on slow fermentation, the flavors deepen over time. Similarly, the mustard oil acts as a natural preservative while absorbing the spice essence.cast/ingredients Specifically, you will need 500 grams of fresh large red chillies. Additionally, gather four tablespoons of mustard seeds and two tablespoons of fennel seeds. Furthermore, prepare one tablespoon of fenugreek seeds and one cup of pure mustard oil. You also need salt, turmeric, and amchur powder for that sour punch. Moreover, ensure all your utensils are completely dry before you begin. Because water causes spoilage, you must be very careful with moisture.songs/steps First, wash the chillies and dry them thoroughly in the sun. Consequently, this removes all moisture and prevents the pickle from rotting. Second, dry roast the whole spices until they become fragrant. However, do not burn them as they will turn bitter. Third, grind the spices into a coarse powder once they cool down. Furthermore, mix this powder with salt, turmeric, and a little warm mustard oil. Fourth, slit the chillies lengthwise and stuff them generously with the spice mix. Finally, place the chillies in a clean glass jar and pour the remaining mustard oil over them until they are submerged.about ### Mastering the Red Chilli Pickle Recipe Mastering the Red Chilli Pickle Recipe requires patience and quality ingredients. However, the effort pays off when the spices mature into a delicious blend. Additionally, you must ensure the chillies are completely moisture-free before stuffing. Because water causes mold, sun-drying them is a crucial step. Therefore, follow each step diligently to achieve that authentic, street-style taste. Moreover, you should use cold-pressed mustard oil for the most pungent results. Consequently, the oil will provide a sharp kick that defines traditional Indian pickles.themes/tips ### Pro Tips for the Best Red Chilli Pickle Recipe Furthermore, you must select firm chillies for the best texture. However, avoid those with soft spots or blemishes. Consequently, your pickle will last for an entire year. Additionally, roasting the spices brings out the natural oils and fragrance. Therefore, do not skip the roasting step. Similarly, always use a dry spoon when taking the pickle out of the jar. Because moisture is the enemy, keeping the jar in a dry place is essential for longevity. Moreover, you can add a bit of white vinegar to increase the shelf life and add extra tanginess.whyWatch/whyTry You should try this recipe because it creates a versatile side dish that lasts. Furthermore, it adds a spicy punch to any boring meal instantly. Consequently, your family will enjoy the authentic taste of home-cooked goodness. Additionally, a homemade jar makes for a wonderful gift for friends and neighbors. Therefore, start your pickling journey today and enjoy the spicy results for months to come!

Read More »

Potato Fry

intro Everyone loves a good Potato Fry Recipe because it brings comfort to any meal. This dish transforms simple tubers into golden, crispy delights. Therefore, you should learn this easy method to upgrade your dinner game instantly. Many families enjoy this dish alongside rice or flatbreads for a complete experience. story/description Potatoes are the world’s most versatile vegetable. Furthermore, they absorb spices beautifully while maintaining a soft interior. This recipe focuses on getting that perfect crunch without deep frying. Consequently, you save time and oil while preparing a healthier version. However, the flavor remains intense and satisfying. You will find that simple ingredients often produce the best results in the kitchen. Additionally, this dish works for any meal of the day, including breakfast.cast/ingredients To begin, gather three large potatoes, peeled and cubed into small pieces. You will also need two tablespoons of cooking oil and one teaspoon of cumin seeds. Additionally, prepare one-half teaspoon of turmeric powder and one teaspoon of red chili powder. Finally, keep salt to taste and fresh cilantro for a bright garnish.songs/steps First, heat the oil in a large pan over medium heat. Next, add the cumin seeds until they begin to sizzle. Furthermore, add the potato cubes and turmeric powder to the pan. Stir them well so the oil coats every single piece. Subsequently, cover the pan for five minutes to soften the potatoes. After that, remove the lid and increase the heat slightly. Sprinkle the chili powder and salt over the potatoes. Consequently, sauté them until they turn golden brown and crispy. Finally, garnish with fresh cilantro and serve the dish while it is hot.about ## Mastering the Crispy Potato Fry Recipe This dish is a staple in many households across the globe. Additionally, it pairs perfectly with lentils, yogurt, or even simple sandwiches. Because it requires minimal ingredients, it is a budget-friendly option for everyone. Furthermore, the preparation takes less than twenty minutes from start to finish. Therefore, it is ideal for busy weeknights when you need a quick side dish. You can serve it as a snack or a main course accompaniment. Most people find the texture irresistible when cooked correctly.themes/tips ## Why This Potato Fry Recipe Works Use starchy potatoes like Russets for the best crunch. Additionally, do not crowd the pan during the cooking process; otherwise, the potatoes will steam instead of fry. Furthermore, soak the cut potatoes in cold water first. Consequently, you remove excess starch, which helps with the final crisping. However, ensure you dry them thoroughly before adding them to the hot oil. You might also add a pinch of garlic powder for extra depth. Consequently, your kitchen will smell amazing as the potatoes brown.whyWatch/whyTry You should try this Potato Fry Recipe because it is incredibly versatile and easy to master. Moreover, children and adults alike adore the salty, crispy flavor of well-seasoned potatoes. Additionally, you can customize the spices to suit your personal preference. Therefore, this Potato Fry Recipe will likely become a recurring favorite in your kitchen rotation. Start cooking now and enjoy a plate of crispy goodness!

Read More »

Spicy Stuffed Brinjal

intro This Brinjal Recipe offers a perfect blend of smoky flavors and spicy goodness. Because it uses simple ingredients, you can cook it very quickly. Additionally, it provides many health benefits for your daily diet. Consequently, this dish remains a favorite in many households across the globe.story/description Brinjal, also known as eggplant, has a long and rich history in global cuisines. However, many people struggle to cook it correctly because the texture can be tricky. Therefore, we created this guide to help you master the dish. Furthermore, the texture of the vegetable changes beautifully when you sauté it over medium heat. Since it absorbs spices very well, the final result is always flavorful. Moreover, you can adjust the heat levels to suit your personal taste. Thus, every single bite feels satisfying and rich. While some prefer it mashed, this version keeps the pieces intact for a better mouthfeel.cast/ingredients To start this Brinjal Recipe, gather two large fresh brinjals. Additionally, you will need two tablespoons of vegetable oil and one teaspoon of cumin seeds. Furthermore, prepare one finely chopped onion and two minced cloves of garlic. Finally, collect your spices including turmeric, red chili powder, and sea salt. Because freshness matters, ensure your herbs like cilantro are also ready for garnishing.songs/steps First, you must wash and cut the vegetables into small, even cubes. Consequently, they will cook at the same rate. Second, heat the oil in a large pan and add the cumin seeds. Once they sizzle, you should add the onions and garlic. Sauté these until they turn a light golden brown. Third, add the brinjals and all the dry spices to the pan. Because you want even coating, stir the mixture thoroughly. Furthermore, cover the pan and cook on low heat for ten minutes. Finally, garnish with fresh cilantro and serve while it is hot.about This Brinjal Recipe represents the heart of home-cooked comfort. While the dish is simple, it carries deep cultural significance in many regions. Therefore, many families pass down these specific instructions through generations. It is a humble meal that proves how basic ingredients can create something extraordinary. Furthermore, it is naturally vegan and gluten-free, making it accessible for everyone.themes/tips You should always use low heat to ensure even cooking throughout the dish. Furthermore, adding a tiny splash of lemon juice provides a lovely tangy kick. Moreover, fresh cilantro improves the aroma significantly before serving. However, do not overcook the vegetable, or it might become too mushy. Additionally, soaking the cut pieces in salt water for ten minutes removes any potential bitterness.whyWatch/whyTry You should try this Brinjal Recipe because it is extremely budget-friendly and nutritious. Additionally, it tastes amazing when you pair it with warm flatbread or steamed rice. Finally, it provides a healthy alternative to heavy meat dishes without sacrificing any flavor. Because it is so easy to make, it will quickly become a staple in your weekly meal rotation.

Read More »

Jaggery Peanut Brittle 

intro If you love sweet and crunchy snacks, you must try this Jaggery Peanut Brittle. This traditional treat combines roasted peanuts with rich, golden jaggery syrup. Furthermore, it is much healthier than candies made with refined sugar. Consequently, families often prepare this during winter months for a quick energy boost. Moreover, you can make it at home with just a few simple ingredients.story This snack, also known as Chikki in India, has a long and delicious history. People originally made it to provide warmth and nutrition during cold weather. Therefore, it remains a staple in many households today. The combination of earthy peanuts and caramel-like jaggery creates a unique flavor profile. Additionally, the texture provides a satisfying snap when you bite into it. However, the secret lies in achieving the perfect syrup consistency. Once you master the syrup, you will enjoy the best homemade candy ever.cast 2 cups of roasted peanuts, 1.5 cups of grated jaggery, 1 tablespoon of ghee (clarified butter), 1/2 teaspoon of cardamom powder, 1 tablespoon of water.songs 1. Grease a flat tray or parchment paper with ghee and set it aside carefully. 2. Roast the peanuts in a pan until they are crunchy and then remove the skins. 3. Heat the grated jaggery in a heavy-bottomed pan with one tablespoon of water. 4. Stir the mixture continuously until the jaggery melts and begins to bubble. 5. Check the consistency by dropping a bit of syrup into cold water; it should turn brittle and snap immediately. 6. Add the roasted peanuts and cardamom powder to the syrup very quickly. 7. Mix well to coat every peanut thoroughly and then pour the mixture onto the greased tray. 8. Flatten it with a greased rolling pin while the mixture is still hot. 9. Cut the sheet into squares while warm and let it cool completely before snapping the pieces apart.about ### Why Choose This Jaggery Peanut Brittle Recipe? Choosing this Jaggery Peanut Brittle Recipe means you are opting for a nutrient-dense snack. Jaggery contains essential minerals like iron and magnesium that sugar lacks. Moreover, peanuts provide a high amount of protein and healthy fats for your body. Therefore, this snack is perfect for children and adults who need a natural energy source during the day. Additionally, it contains no artificial preservatives or colors. Consequently, it is a clean-label treat that you can trust for your family. Furthermore, the preparation time is very short, so you can make it anytime a craving hits.themes ### Tips for the Perfect Jaggery Peanut Brittle Recipe To ensure success, always use high-quality jaggery for the best flavor and deep color. Furthermore, roasting the peanuts properly is vital for the final crunch. If you do not roast them enough, the brittle will feel soft or chewy instead of crisp. Additionally, work very fast once the syrup reaches the hard-ball stage because it sets quickly. However, be careful as the molten sugar mixture is extremely hot. Consequently, keep all your tools ready before you start the cooking process. Finally, store the cooled pieces in an airtight container to keep them crisp for several weeks.whyWatch You should try this recipe because it is simple, healthy, and very cost-effective. Furthermore, it allows you to control the quality of ingredients in your food. Consequently, you can enjoy a guilt-free dessert whenever you have a sweet craving. Additionally, it makes for a wonderful homemade gift for friends and family during festive seasons. Therefore, start cooking today and enjoy the classic, nostalgic taste of homemade brittle.

Read More »

Tomato Pappu

intro Tomato Pappu Recipe is a beloved staple in many South Indian households. This comforting dish combines protein-packed lentils with juicy tomatoes to create a hearty meal. Therefore, it creates a perfect balance of earthy and tangy flavors for your dinner table. Additionally, it serves as a nutritious and filling meal for busy weeknights.story/description Every Indian home has its own unique version of lentil soup, yet this Andhra-style dal truly stands out. Many people call it the ultimate comfort food because of its simplicity and warmth. Moreover, the aroma of ghee and roasted garlic filling the kitchen is simply unforgettable. You will love how the tomatoes soften into the lentils during the cooking process. Furthermore, this recipe brings a piece of traditional Telugu culture directly to your dining table. However, you do not need any special skills to master this dish. Consequently, it has become a favorite choice for both beginners and experienced cooks alike. It reminds us that sometimes the simplest ingredients create the most profound memories.cast/ingredients 1 cup Toor Dal (Pigeon Peas), 3 large Ripe Tomatoes (chopped), 2 Green Chilies (slit), 1 teaspoon Turmeric Powder, 1 teaspoon Red Chili Powder, 1 teaspoon Salt, 2 tablespoons Ghee or Oil, 1 teaspoon Mustard Seeds, 1 teaspoon Cumin Seeds, 5 Garlic Cloves (crushed), 2 Dry Red Chilies, A handful of Curry Leaves, 1/4 teaspoon Asafoetida (Hing).songs/steps First, rinse the toor dal thoroughly under cold water to remove impurities. Place the dal, chopped tomatoes, green chilies, and turmeric in a pressure cooker. Add three cups of water and cook for four whistles until the dal becomes soft. Once the pressure releases naturally, mash the dal and tomatoes gently with a spoon. Add red chili powder and salt to the mixture while it is still warm. Heat the ghee in a small pan for the tempering process. Add mustard seeds and cumin seeds until they begin to pop. Throw in the crushed garlic, dry red chilies, curry leaves, and asafoetida once they sizzle. Pour this aromatic tempering immediately over the mashed dal. Finally, simmer the mixture for two minutes and serve it hot.about ## Why You Should Make This Tomato Pappu Recipe Today This dish uses basic pantry staples that you likely already have in your kitchen. Firstly, you must choose high-quality pigeon peas to ensure a creamy texture. Because these lentils provide a smooth base, they act as the perfect foundation for the tanginess. Secondly, the addition of fresh, ripe tomatoes introduces a refreshing acidity to the stew. Therefore, the flavor profile remains vibrant rather than flat or boring. Additionally, many people prefer adding a small touch of tamarind for extra zing. However, the tomatoes usually provide enough sourness on their own. Consequently, this Tomato Pappu Recipe remains one of the most popular ways to enjoy lentils in India.themes/tips ## Perfecting Your Homemade Tomato Pappu Always use ripe, red tomatoes to ensure the best flavor for your stew. Consequently, avoid using canned tomatoes as they lack the fresh tang required for this dish. Sautéing the garlic until it turns golden brown adds a wonderful smoky depth. Additionally, you can adjust the spice level by changing the number of green chilies you use. Therefore, this recipe is highly customizable for different palates and heat tolerances. Furthermore, adding a pinch of sugar or jaggery can balance the acidity if the tomatoes are too sour.whyWatch/whyTry You should try this recipe because it is both healthy and incredibly delicious. It offers a great source of plant-based protein for vegetarians. Furthermore, the cooking time is minimal, which makes it perfect for a fast dinner after work. However, the rich and complex taste will make it seem like you spent hours in the kitchen. Finally, it provides a warm, home-cooked feeling that store-bought meals simply cannot replicate. Serve it with hot rice and a dollop of ghee for the best experience.

Read More »

Majjiga Pulusu

intro The Majjiga Pulusu Recipe brings traditional South Indian comfort to your dining table effortlessly. Furthermore, this dish provides a refreshing relief during hot summer days because of its cooling properties. You can prepare this tangy buttermilk stew quickly for lunch or dinner. Therefore, it remains a favorite in many households across Andhra Pradesh and Telangana. Additionally, the dish uses simple pantry staples that you likely already have.story/description This dish originates from the heart of South India, where curd-based recipes are daily essentials. Consequently, every family has its own unique version passed down through generations. However, the core ingredients remain consistent across different regions. You use sour yogurt as the base to create a rich, tangy liquid. Additionally, you add vegetables like okra, bottle gourd, or drumsticks to enhance the texture. Because the dish is light on the stomach, it aids digestion perfectly after a heavy meal. Moreover, the tempering of mustard seeds and fresh curry leaves adds a wonderful aroma that fills the entire kitchen.cast/ingredients To recreate this Majjiga Pulusu Recipe, you will need 2 cups of thick sour curd (whisked) and 1 cup of water. Furthermore, gather 1/2 teaspoon of turmeric powder and salt to taste. For the vegetables, prepare 1 cup of chopped bottle gourd or okra. Additionally, prepare the tempering with 2 tablespoons of oil, 1 teaspoon of mustard seeds, 1/2 teaspoon of cumin seeds, 2 dried red chilies, a pinch of asafoetida, and a handful of fresh curry leaves. Finally, keep 2 chopped green chilies and 1 inch of grated ginger ready for extra spice.songs/steps 1. Firstly, whisk the sour curd and water in a large bowl until the mixture is completely smooth. 2. Secondly, add turmeric powder and salt to this mixture and set it aside. 3. Boil the chopped vegetables in a separate pot until they become tender but not mushy. 4. Once the vegetables are ready, pour the buttermilk mixture into the pot. 5. Heat the mixture on a very low flame while you stir it constantly to prevent curdling. 6. In a small pan, heat the oil and add mustard seeds, cumin, red chilies, and curry leaves. 7. Furthermore, add the ginger and green chilies to the tempering and sauté for thirty seconds. 8. Pour this hot tempering over the buttermilk stew and mix it gently. 9. Finally, turn off the heat immediately and serve the dish warm.about This Majjiga Pulusu Recipe is more than just a curry; it is a cultural staple in South Indian cuisine. Similarly to the North Indian Kadhi, this version focuses on lightness and tanginess rather than thickness. Many people enjoy it because it balances spicy side dishes perfectly. Furthermore, the probiotics in the curd offer significant health benefits. Therefore, it serves as a functional food that supports gut health while tasting delicious.themes/tips Follow these tips to perfect your Majjiga Pulusu Recipe every time. Firstly, always use whisked curd to avoid unsightly lumps in your stew. If you use fresh curd, the taste might feel too mild; therefore, many cooks prefer slightly sour yogurt for a better punch. Furthermore, do not boil the stew on high heat. If you overheat the liquid, the buttermilk will separate and spoil the texture. Instead, simmer it gently for the best results. Additionally, you can add a tablespoon of gram flour (besan) to the curd if you prefer a thicker consistency. Consequently, the flavor profile becomes more robust and creamy.whyWatch/whyTry You should try this dish because it is incredibly healthy and low in calories. Furthermore, the preparation takes less than twenty minutes, which is perfect for busy weeknights. Therefore, you do not need to spend hours in the kitchen to enjoy a gourmet meal. Additionally, the tangy flavor pairs beautifully with steamed rice and a side of crispy fryums or potato roast. Consequently, this Majjiga Pulusu Recipe will surely become a recurring star on your weekly menu.

Read More »

Mukkala Pulusu

intro Are you looking for a comforting meal that warms the soul? The Mukkala Pulusu Recipe provides a burst of authentic flavor in every single spoonful. Many families in Andhra Pradesh love this dish because it combines several fresh vegetables into one pot. Therefore, it is both healthy and incredibly delicious for people of all ages. Additionally, this tangy stew pairs perfectly with hot steamed rice and a dollop of ghee. You can prepare it quickly for a simple weekday lunch or a grand family gathering. Furthermore, the rich, tangy aroma will fill your kitchen instantly and make everyone hungry.story Historically, Mukkala Pulusu has been a beloved staple in many Telugu households for generations. People often serve it during festive occasions and traditional ceremonies to ensure a balanced meal. Specifically, it represents the classic ‘pulusu’ style of cooking, which highlights the importance of tamarind in South Indian cuisine. Consequently, the dish perfectly balances sharp sourness with a subtle hint of sweetness from jaggery. Moreover, home cooks traditionally use various seasonal vegetables to create this hearty and colorful meal. However, today it is a celebrated delicacy found in many authentic restaurants. Because of its great versatility, you can add any greens or root vegetables you have on hand. Thus, every bowl you cook feels unique, fresh, and deeply satisfying.cast/ingredients To begin this flavorful journey, gather these essential ingredients: 2 cups of mixed chopped vegetables (such as drumstick, pumpkin, sweet potato, and carrot), 1 large red onion, and 2 sliced green chilies. Additionally, you need a small ball of tamarind soaked in water, 2 tablespoons of jaggery, a pinch of turmeric, and salt to taste. For the tempering, prepare mustard seeds, cumin seeds, dried red chilies, fresh curry leaves, and a dash of asafoetida. Furthermore, use 2 tablespoons of high-quality oil or ghee for the best flavor profile.songs/steps First, extract the juice from the soaked tamarind and set it aside. Meanwhile, heat oil in a deep pot over medium flame. Add the tempering ingredients and wait until they splutter and release their aroma. Consequently, add the onions and green chilies to the pot. Sauté them until they turn golden and soft. Next, add all the chopped vegetables and stir them well for about two minutes. Afterward, pour in the tamarind extract along with two cups of water. Add the salt, turmeric, and jaggery to the mix. Therefore, let the mixture boil steadily on medium heat. Cook until the vegetables become tender but not mushy. Finally, garnish with fresh coriander leaves and serve it hot.about ### Why Choose the Mukkala Pulusu Recipe? This dish is much more than just a vegetable soup; it is a true nutritious powerhouse. Specifically, the wide variety of vegetables provides essential vitamins and minerals for your body. Furthermore, the tamarind acts as a natural digestive aid after a heavy meal. Moreover, the Mukkala Pulusu Recipe is very flexible and forgiving for beginner cooks. You can easily adjust the spice and tanginess levels according to your personal preference. However, the most authentic taste comes from the patient slow-simmering process of the vegetables. Thus, do not rush the boiling stage if you want the best results. Additionally, the sweetness of the jaggery perfectly cuts through the tamarind’s natural acidity, creating a harmonious taste.themes/tips To get the best possible flavor, always use fresh drumsticks as they add a distinct woody aroma to the stew. Furthermore, do not overcook the vegetables until they lose their shape and become mushy. Instead, keep them slightly firm so they retain a better texture in the mouth. Consequently, the dish will also look more appealing and vibrant on the dinner plate. Moreover, try adding a spoonful of fresh ghee right before you serve the dish. This simple addition enhances the richness of the pulusu significantly. Additionally, you can add a tiny bit of rice flour mixed with water at the end. This technique helps thicken the gravy if it looks a bit too thin for your liking.whyWatch/whyTry You should definitely try this dish because it is the ultimate comfort food for any season. It reminds many people of the warm, home-cooked meals prepared by their grandmothers. Therefore, it brings a beautiful sense of nostalgia to your dining table. Additionally, it is an excellent way to feed a variety of vegetables to children who might be picky eaters. Because the sauce has a pleasant sweet and sour taste, kids often enjoy it without any complaints. Furthermore, it is a completely vegan-friendly option that satisfies everyone at the table. Try the Mukkala Pulusu Recipe today and enjoy a genuine piece of South Indian culinary tradition.

Read More »

Chekkalu

intro Everyone loves a crunchy snack during tea time. This Chekkalu Recipe offers a perfect solution for snack enthusiasts. It brings the traditional flavors of Andhra Pradesh into your home. Therefore, you can enjoy these savory crackers whenever you desire. Furthermore, they are very easy to prepare with minimal ingredients. You can serve them to guests or pack them for long journeys.story Chekkalu, often called Pappu Chekkalu, are legendary in South Indian households. Families traditionally prepare these snacks during festive seasons like Sankranti or Diwali. Consequently, the kitchen fills with the delightful scent of curry leaves and fried dough. However, these crackers are also perfect for daily snacking. Many people love them because they offer a satisfying crunch. Additionally, the spice level is easy to adjust according to your preference. This snack connects generations through its timeless taste. Parents often pass down their unique versions of the recipe to their children.cast To begin, you will need two cups of high-quality rice flour. You also need two tablespoons of soaked chana dal and a fresh paste made from ginger and green chilies. Additionally, gather fresh curry leaves and a pinch of cumin seeds. You must include two tablespoons of butter for the right texture. Finally, keep some salt and plenty of oil ready for deep frying.songs First, take a large mixing bowl and add the rice flour. Then, incorporate the salt, cumin seeds, and butter. Rub the butter into the flour thoroughly with your fingers. Furthermore, add the soaked chana dal, chopped curry leaves, and the ginger-chili paste. Gradually pour hot water into the bowl. Therefore, you can form a smooth and firm dough that does not stick. Next, divide the dough into small, lemon-sized balls. Use a greased plastic sheet or a banana leaf to flatten each ball. Consequently, you should create thin, circular discs. Heat the oil in a deep pan. Carefully drop the discs into the hot oil. Fry them on medium heat until they become golden and crisp. Finally, drain the excess oil on paper towels and let them cool.about This Chekkalu Recipe produces a snack that is naturally gluten-free because it uses rice flour as the primary base. Moreover, it is a vegan-friendly option if you substitute butter with oil or a plant-based margarine. The snack serves as a great travel companion because it stays fresh for up to three weeks. It is popular across South India under various names, yet the core ingredients remain the same.themes Always use hot water when kneading the dough. This specific step ensures that the Chekkalu Recipe yields very crispy results every time. Additionally, ensure the oil is at the right temperature before you start frying. If the oil is too cold, the crackers will absorb too much fat and become greasy. Conversely, if the oil is too hot, the crackers will burn on the outside while remaining raw inside. Therefore, maintaining a steady medium heat is essential for the perfect texture. Moreover, pressing the discs very thin will result in a louder crunch.whyWatch You should try this recipe because it is much healthier than store-bought chips. Furthermore, it allows you to control the quality of the oil and the amount of salt used. Your family will definitely appreciate the homemade touch and the authentic taste. Therefore, grab your apron and start cooking this delicious, crunchy snack today! You will find it hard to stop at just one bite.

Read More »

Sakkinalu

intro Are you looking for a crunchy and traditional snack to brighten your tea time? This Sakkinalu Recipe is exactly what you need to satisfy your cravings. Furthermore, it is a deep-fried delight that hails from the vibrant Telangana region. People usually prepare this treat during the Makar Sankranti festival. However, you can enjoy it at any time of the year. Additionally, it requires very few ingredients from your pantry. Therefore, anyone can try making this at home without much trouble. story This snack holds a very special place in South Indian culture. Specifically, families gather together to shape these beautiful rings by hand. Consequently, the preparation process brings people together and builds community. Moreover, the wonderful aroma of fried sesame seeds fills the air during the holidays. Traditionally, mothers teach their daughters this intricate art. Therefore, the tradition continues through many generations. Each ring tells a story of patience and love. cast The Sakkinalu Recipe requires very basic ingredients to achieve its signature taste. Specifically, you will need raw rice as the main base. Additionally, gather plenty of sesame seeds and carom seeds for flavor. Furthermore, keep salt and water ready for the dough. Finally, ensure you have enough high-quality oil for deep frying the rings. songs 1. Soak the raw rice in water for at least five hours. Furthermore, drain the water completely after soaking. 2. Grind the damp rice into a very fine powder. Consequently, sieve the flour to remove any large lumps. 3. Add the sesame seeds, carom seeds, and salt to the rice flour. Similarly, mix them thoroughly so the seeds distribute evenly. 4. Sprinkle water slowly over the mixture to create a soft, pliable dough. However, do not make it too watery or sticky. 5. Spread a clean, dry cotton cloth on a flat surface. Additionally, take small portions of the dough in your hand. 6. Shape the dough into concentric circles directly on the cloth. Therefore, use your fingers with a gentle touch to form thin strands. 7. Let these circles dry for about fifteen minutes. Moreover, heat the oil in a deep frying pan on medium heat. 8. Fry the rings carefully until they turn a perfect golden brown. Consequently, drain the excess oil on a paper towel. about ## Mastering the Sakkinalu Recipe at Home This dish is unique because it uses no gram flour or heavy spices. Instead, it relies on the purity of high-quality rice. Furthermore, the incredible crunch comes from the natural drying process on the cloth. Therefore, you should never skip the drying step. Additionally, always use fresh oil to ensure the best flavor profile. Consequently, your snacks will stay fresh and delicious for several weeks in a container.themes Use old rice for a much better and crispier texture. Similarly, ensure the dough stays moist while you are shaping the rings. If the dough dries out too quickly, simply add a few drops of water. However, avoid over-handling the rings once they are shaped. Moreover, store them in an airtight container only after they cool down completely. Consequently, they will remain crispy for a very long time.whyWatch You should try this Sakkinalu Recipe because it is both healthy and gluten-free. Furthermore, it offers a unique handmade texture that store-bought snacks simply cannot match. Additionally, making it at home ensures total hygiene for your family. Therefore, treat your loved ones to this traditional masterpiece. Specifically, it pairs perfectly with a hot cup of chai or coffee during a rainy evening.

Read More »

Chekkara Pongali

intro Are you looking for a traditional South Indian sweet to brighten your day? The Chekkara Pongali Recipe offers a perfect blend of rice, lentils, and golden jaggery. Specifically, people usually prepare this dish during festivals like Sankranti or Navratri. Therefore, learning the Chekkara Pongali Recipe allows you to bring a touch of divinity to your kitchen. Furthermore, the rich aroma of ghee and cardamom makes it irresistible for everyone in the family.story ### History of the Chekkara Pongali Recipe Chekkara Pongali holds a special place in South Indian temples and homes. Moreover, priests often serve it as ‘Prasadam’ because it uses pure and natural ingredients. Additionally, the word ‘Chekkara’ refers to sugar or jaggery in different southern regions. Consequently, the dish gains a deep, earthy sweetness that refined white sugar cannot replicate. However, you must cook the rice and moong dal to a mushy consistency for the best results. Since this dish represents prosperity, families share it during harvest festivals to celebrate abundance. Furthermore, the golden color of the jaggery symbolizes the warmth of the sun and the joy of life.cast 1 cup Raw Rice, 1/2 cup Moong Dal, 1.5 cups Jaggery (grated), 1/4 cup Ghee, 1/2 teaspoon Cardamom powder, 2 tablespoons Cashews, 1 tablespoon Raisins, 3 cups Water, A tiny pinch of Edible Camphor.songs ### Simple Steps to Master the Chekkara Pongali Recipe First, dry roast the moong dal until it releases a nutty aroma. Next, wash the roasted dal and rice together thoroughly. After that, pressure cook them with three cups of water until they become soft. Meanwhile, dissolve the jaggery in half a cup of water over medium heat. Furthermore, strain the jaggery syrup to remove any impurities. Then, add the syrup to the cooked rice mixture and stir well. Additionally, heat ghee in a small pan and fry the cashews and raisins until they turn golden brown. Finally, mix the ghee, nuts, and cardamom powder into the pongal. Consequently, the dish will achieve a glossy and rich texture that melts in your mouth.about This recipe is a staple in Andhra Pradesh and Tamil Nadu. It combines essential carbohydrates with protein-rich lentils, making it a wholesome treat for kids and adults alike. Additionally, it remains a favorite for religious offerings.themes ### Expert Tips for Perfect Sweet Pongal Always use aged rice because it absorbs the jaggery syrup better. Moreover, roasting the dal is a crucial step for a deep flavor. Therefore, do not skip the roasting process. If the pongal becomes too thick, you can add a little warm milk or water to adjust the consistency. However, keep the flame low while mixing the jaggery to avoid burning the base. Additionally, adding a tiny pinch of salt enhances the sweetness significantly. Consequently, your dessert will taste balanced and professional.whyWatch You should try this recipe because it is nutritious and soul-satisfying. Furthermore, it requires simple pantry staples that you likely already have. Therefore, you can make it anytime you crave something sweet without much preparation. Additionally, it is a healthy alternative to processed desserts.

Read More »
కావలసిన పదార్ధాలు
  • పండు మిరపకాయలు Red Chillies (Fresh and ripe) 500 grams
  • చింతపండు Tamarind (Deseed and cleaned) 100 grams
  • ఉప్పు Salt (Preferably sea salt) 100 grams
  • పసుపు Turmeric Powder 1 tablespoon
  • మెంతులు Fenugreek Seeds 1 tablespoon
  • నువ్వుల నూనె Sesame Oil (Gingelly oil) 1/2 cup
  • ఆవాలు Mustard Seeds 1 tablespoon
  • ఇంగువ Asafoetida 1/4 teaspoon
  • వెల్లుల్లి రెబ్బలు Garlic Cloves (Crushed) 10 cloves
  • ఆవ పిండి Mustard Powder 2 teaspoons
తయారి విధానం
  1. ముందుగా పండు మిరపకాయలను శుభ్రంగా కడిగి తడి లేకుండా పొడి గుడ్డతో తుడిచి పూర్తిగా ఆరనివ్వాలి. పచ్చడి ఎక్కువ కాలం నిల్వ ఉండాలంటే తడి అస్సలు ఉండకూడదు.
    Wash the fresh red chillies thoroughly and wipe them with a dry cloth. Spread them out to air-dry completely as any moisture will cause the pickle to spoil.
  2. చింతపండు నుండి గింజలు పీచు తీసి శుభ్రం చేసి పెట్టుకోవాలి.
    Ensure the tamarind is free from seeds and fibers before using it.
  3. ఒక మిక్సీ జార్‌లో ఆరిన పండు మిరపకాయలు ఉప్పు మరియు చింతపండు వేసి కొంచెం కచ్చాపచ్చాగా గ్రైండ్ చేసుకోవాలి.
    In a blender or a stone mortar, add the dried red chillies, salt, and tamarind. Grind them into a coarse paste.
  4. మెంతులను ఒక పాన్‌లో దోరగా వేయించి చల్లారిన తర్వాత మెత్తటి పొడిలా చేసుకోవాలి.
    Dry roast the fenugreek seeds in a pan until they turn golden brown. Once cooled, grind them into a fine powder.
  5. గ్రైండ్ చేసిన మిశ్రమాన్ని ఒక గిన్నెలోకి తీసుకుని అందులో పసుపు మెంతి పొడి మరియు ఆవ పిండి వేసి బాగా కలపాలి.
    Transfer the chilli-tamarind paste to a mixing bowl and stir in the turmeric powder, roasted fenugreek powder, and mustard powder.
  6. ఒక పాన్‌లో నువ్వుల నూనె వేడి చేసి అందులో ఆవాలు వేయాలి. ఆవాలు చిటపటలాడిన తర్వాత ఇంగువ మరియు దంచిన వెల్లుల్లి రెబ్బలు వేసి వేయించాలి.
    Heat sesame oil in a pan for tempering. Add mustard seeds and let them splutter. Then add the crushed garlic cloves and asafoetida, frying until the garlic turns slightly golden.
  7. పోపు పూర్తిగా చల్లారిన తర్వాత మాత్రమే పచ్చడి మిశ్రమంలో వేసి బాగా కలపాలి.
    Allow the tempering to cool down completely to room temperature before adding it to the pickle mixture.
  8. ఈ పచ్చడిని ఒక రోజంతా పక్కన పెడితే రుచులు బాగా పడతాయి. ఆ తర్వాత గాలి చొరబడని గాజు సీసాలో భద్రపరుచుకోవాలి.
    Mix everything thoroughly and let it sit for a day for the flavors to meld. Store it in a sterilized airtight glass jar.
[real3dflipbook id='1']