Edit Template

Recipe Tag: South Indian

Palak Rice

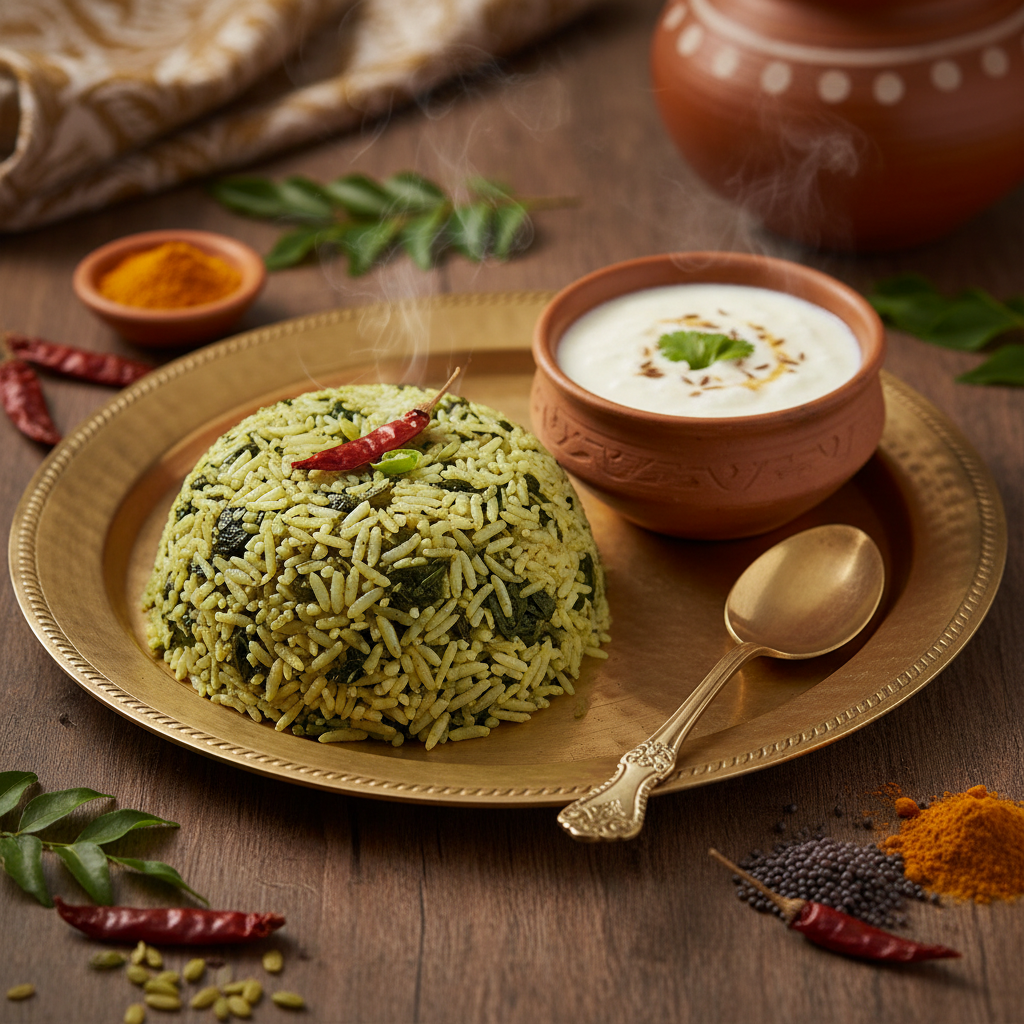
intro Are you looking for a vibrant meal that packs a punch? This Palak Rice Recipe offers a perfect blend of health and taste. Furthermore, you can prepare it in under thirty minutes. Many people struggle with healthy eating daily. However, this dish makes nutrition simple and delicious. Therefore, you should definitely add it to your weekly rotation. story This Palak Rice Recipe celebrates the heart of Indian home cooking. It brings the freshness of the garden directly to your dinner table. Specifically, the recipe uses vibrant spinach leaves to create a nutritious base. Because spinach contains high levels of iron, this meal provides a natural energy boost. Additionally, the aromatic spices elevate the flavor to a professional level. ### Why Choose This Palak Rice Recipe? You will love how the earthy spinach pairs with fluffy basmati rice. Moreover, the bright green color appeals to children who might usually avoid greens. Consequently, you can serve a healthy meal without any complaints. Although some people find spinach bitter, the addition of garlic and onions balances the taste perfectly. Therefore, every spoonful offers a harmonious blend of savory and spicy notes. Furthermore, this dish remains highly versatile. You can serve it as a main course or a side dish for a larger feast. Similarly, it works wonders as a quick lunch box option. Because it tastes great even when cold, busy professionals often choose it for work meals. Consequently, this recipe has become a staple in many households across the globe. Ingredients 2 cups fresh spinach leaves, 1 cup basmati rice, 1 large onion (sliced), 2 cloves of garlic (minced), 1 inch ginger (grated), 2 green chilies, 1 teaspoon cumin seeds, 2 cloves, 1 small cinnamon stick, 2 tablespoons oil or ghee, salt to taste.songs First, wash the basmati rice and soak it for twenty minutes. Meanwhile, blanch the spinach in boiling water for two minutes. Next, blend the blanched spinach with green chilies to make a smooth puree. Then, heat oil in a large pan and add the cumin, cloves, and cinnamon. Consequently, the spices will release a wonderful aroma. Add the onions, ginger, and garlic to the pan and sauté until golden brown. ### Mastering the Best Palak Rice Recipe Next, pour the spinach puree into the pan. Stir it well and cook for three minutes. Additionally, add the soaked rice and mix gently to coat every grain. Then, add two cups of water and salt. Cover the pan and simmer on low heat until the rice absorbs all the water. Consequently, the rice will become fluffy and fragrant. Finally, turn off the heat and let it rest for five minutes before serving. Similarly, you can fluff the rice with a fork to maintain its texture. about Palak rice, also known as spinach rice, is a classic one-pot meal. It is a favorite in many Indian states because it is both light and filling. Therefore, it suits a variety of dietary needs. Moreover, it is naturally gluten-free and can be made vegan by using oil instead of ghee. Consequently, it is a safe and healthy choice for almost everyone at your table. Use fresh spinach for the best color. Additionally, do not overcook the rice, or it will become mushy. You can also add sweet corn or paneer cubes to enhance the texture. Furthermore, always wash the rice thoroughly to remove excess starch. Consequently, your grains will stay separate and beautiful. Finally, a squeeze of lemon juice right before serving adds a refreshing zing.whyWatch/whyTry You should try this recipe because it simplifies healthy eating. Furthermore, it saves time on busy weeknights. Because it requires minimal cleanup, you can enjoy your evening more. Consequently, this dish proves that fast food can be healthy and homemade. Therefore, grab your apron and start cooking this delicious meal today!

Read More »

Vankaya Fry

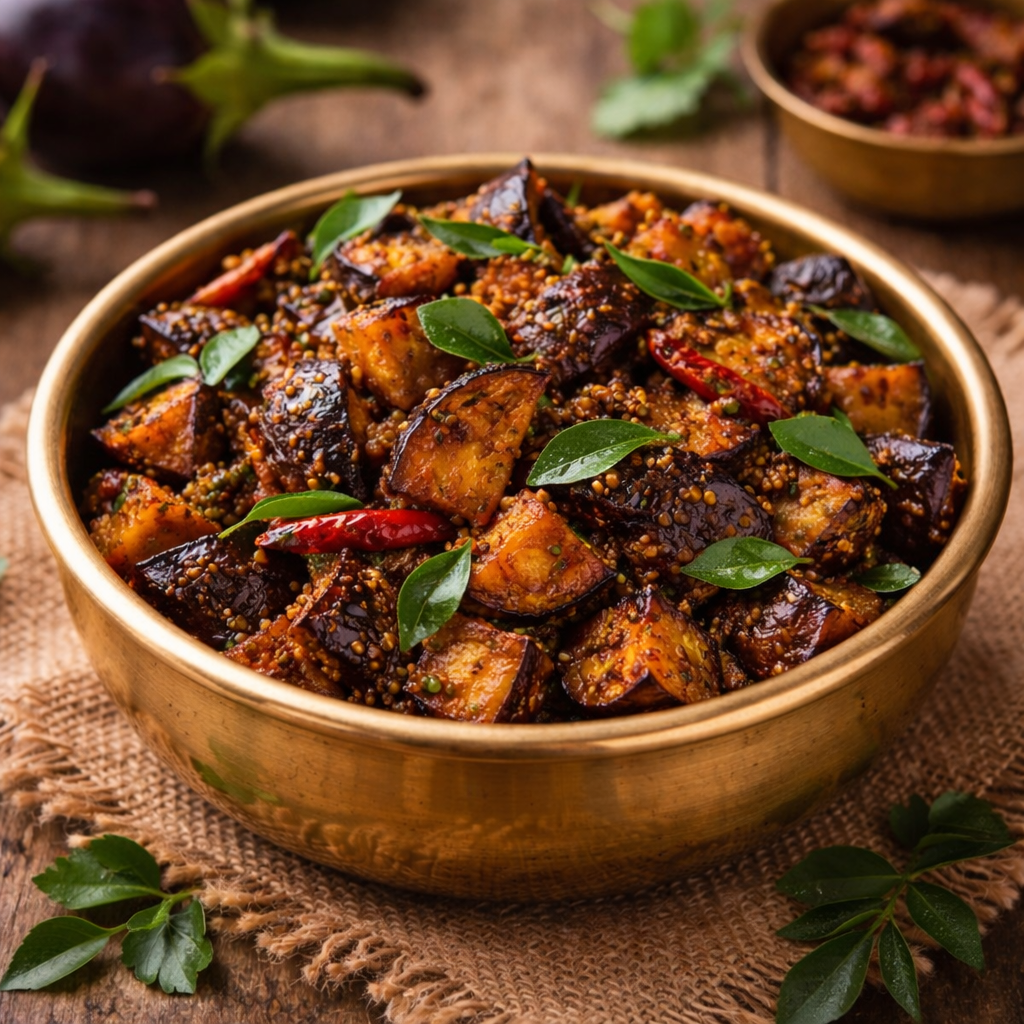
intro Welcome to our kitchen! Today, we explore the authentic Vankaya Fry Recipe. This dish hails from South India and tastes amazing. People love it for its simple yet bold flavors. Furthermore, you can prepare it in just twenty minutes. Consequently, it is a perfect side dish for busy weekdays when you need something fast and tasty.story Brinjals, also known as eggplants, are the stars of this meal. This Vankaya Fry Recipe transforms humble vegetables into a crispy delight. Additionally, the spice mix adds a deep earthy aroma to every bite. Therefore, even people who usually dislike brinjals find this dish irresistible. Moreover, you can adjust the heat level easily to suit your own palate. It is a versatile dish that fits any meal plan.cast 250g small purple eggplants (Vankaya),2 tablespoons cooking oil,1 teaspoon mustard seeds,1 teaspoon cumin seeds,A pinch of turmeric powder,1 tablespoon red chili powder,Salt to taste,1 sprig fresh curry leaves,3 garlic cloves (crushed)songs First, wash and slice the brinjals into thin rounds or long strips.,Then, heat the oil in a wide pan over medium heat.,Next, add the mustard seeds and cumin seeds to the hot oil.,When they splutter, toss in the fresh curry leaves and crushed garlic.,Afterward, add the sliced brinjals to the pan carefully.,Sprinkle the turmeric and salt over the vegetables to enhance the color.,Stir everything well and cook on medium heat without a lid.,Once the brinjals soften, add the red chili powder for a spicy kick.,Finally, fry until they reach your desired level of crispiness.about ## Master the Vankaya Fry Recipe Today. This dish is a staple in many traditional Andhra households. It pairs beautifully with steamed rice and hot dal. However, it also works incredibly well with roti or paratha. Furthermore, it uses minimal ingredients that you already have in your pantry. Consequently, it remains a budget-friendly option for a nutritious family meal. It truly represents the comfort of home cooking.themes To get the best results, always choose tender, seedless eggplants for this dish. Use a cast-iron pan if you want extra crispiness. Additionally, do not cover the pan while frying. If you cover it, the brinjals will become mushy rather than crispy. Therefore, keep the heat consistent for even cooking across the pan. Moreover, you can add some peanut powder at the end for a nutty flavor profile.whyWatch You should try this recipe because it is incredibly fast and healthy. It provides essential nutrients like fiber and antioxidants. Moreover, the flavors are truly authentic and satisfying. Thus, it brings a genuine taste of Indian tradition to your dining table. Finally, the crispy texture and spicy aroma are absolutely addictive for kids and adults alike.

Read More »

Dosakaya Kura

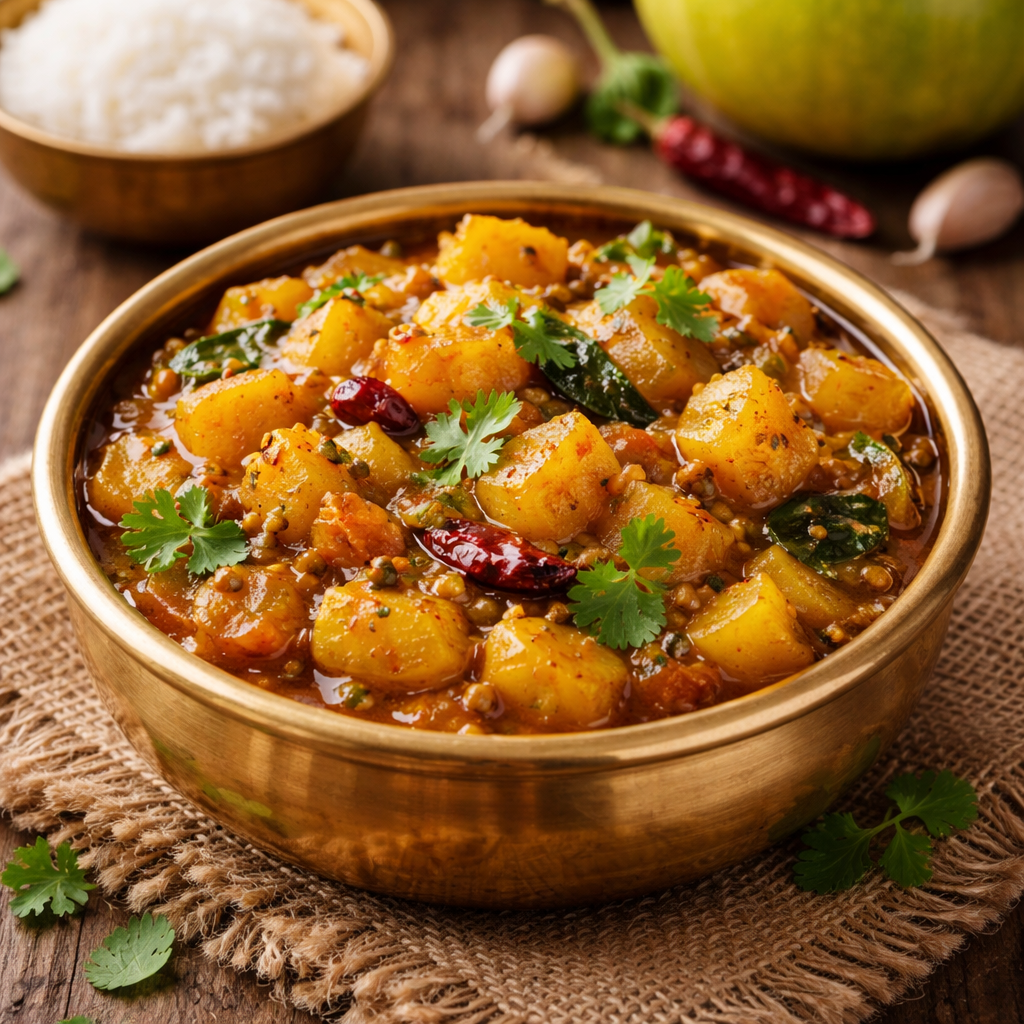
intro Have you ever tasted the tangy goodness of a traditional Andhra meal? If not, you must try this Dosakaya Kura Recipe. This dish features the yellow cucumber, which adds a unique crunch to your plate. Additionally, it provides a cooling effect during hot summer days. Therefore, many families in South India prepare it regularly. You will find that this simple curry pairs beautifully with steamed rice and a dollop of ghee.story/description Dosakaya Kura is a staple in many Telugu households. The yellow cucumber, or ‘Dosakaya’, has a distinct sourness that sets it apart from regular cucumbers. People often make it as a quick lunch because it requires minimal preparation. Historically, farmers grew these cucumbers in their backyards. Consequently, they developed many variations of this recipe. Some people add lentils, while others prefer this simple stir-fry version. Furthermore, the dish represents the simplicity of rural Indian cooking. It focuses on fresh produce and basic spices. Because it is light on the stomach, it serves as a perfect comfort food.cast/ingredients 1 medium Yellow Cucumber (Dosakaya), 2 tablespoons Oil, 1/2 teaspoon Mustard seeds, 1/2 teaspoon Cumin seeds, 2 Green chilies (slit), 1 sprig Curry leaves, 1/4 teaspoon Turmeric powder, 1 teaspoon Red chili powder, Salt to taste, Fresh coriander for garnish.songs/steps First, peel the cucumber and remove the seeds carefully. Second, chop the cucumber into small, even cubes. Third, heat oil in a pan over a medium flame. Fourth, add mustard seeds and let them splutter. Fifth, stir in the cumin seeds, green chilies, and fresh curry leaves. Sixth, add the cucumber cubes and turmeric powder to the pan. Seventh, sauté the mixture for about five minutes until the pieces are slightly tender. Eighth, sprinkle the red chili powder and salt over the pieces. Ninth, mix everything well and cook for another three minutes. Finally, turn off the heat and garnish the dish with fresh coriander.about This Dosakaya Kura Recipe offers a nutritious way to enjoy seasonal vegetables. The yellow cucumber is rich in fiber and water content. Therefore, it helps with hydration and digestion. Additionally, the spices used in the tempering have medicinal properties. For example, turmeric acts as an anti-inflammatory agent. Similarly, cumin seeds aid in better digestion. Because this recipe uses very little oil, it is a heart-healthy choice for everyone. You can enjoy it with roti or rice without any guilt. Furthermore, the tangy flavor helps to stimulate the appetite.themes/tips Always taste the raw cucumber before you start the Dosakaya Kura Recipe. Occasionally, these cucumbers can be bitter. If you find a bitter one, discard it immediately. Additionally, do not overcook the cucumber. The crunch is the best part of this dish. Therefore, keep the flame on medium to maintain the texture. You can also add a teaspoon of tamarind paste if you want extra sourness. However, the natural tang is usually enough. Furthermore, using peanut oil for tempering adds an extra layer of nutty aroma to the final dish.whyWatch/whyTry You should try this dish because it is incredibly fast to prepare. Most people finish the entire process in less than twenty minutes. Additionally, it introduces you to the authentic flavors of Andhra cuisine. The combination of sour, spicy, and salty notes is truly addictive. Furthermore, it is a budget-friendly meal that uses common pantry items. If you want a healthy, vegan, and gluten-free option, this recipe is perfect for you. Therefore, grab a yellow cucumber today and start cooking!

Read More »

Kanda Bachali Kura

Intro Are you looking for a traditional taste that reminds you of home? The Kanda Bachali Kura Recipe brings authentic Andhra flavors straight to your dining table. This dish combines earthy elephant foot yam with fresh Malabar spinach, creating a unique texture and flavor that food lovers truly enjoy. It is also a festive favorite, often served during weddings and special occasions for its rich and comforting taste. Let us explore how to make this classic together. Story / Description This dish holds a special place in Telugu households across South India. Traditionally, it is prepared during the auspicious Karthika Masam season, celebrating nature’s harvest. The combination of yam (Kanda) and spinach (Bachali) offers balanced nutrition, making it both wholesome and satisfying. The true highlight lies in the pungent mustard paste, which gives the curry its bold and aromatic kick. Tamarind adds a gentle tang that balances the natural bitterness of yam. Passed down through generations, this recipe represents heritage and tradition in every bite. Why Choose This Kanda Bachali Kura Recipe? You can prepare this dish easily using simple, wholesome ingredients. Properly cleaning the yam is important to avoid any itchy sensation. Fresh Malabar spinach enhances both color and nutritional value. Following traditional methods preserves the authentic taste, making the dish truly special. It pairs beautifully with hot rice and a spoon of ghee, often leaving guests asking for more. Cast / Ingredients For Tempering:2 tablespoons Oil, 1 teaspoon Mustard seeds, 1 teaspoon Urad dal, 2 Dried red chilies, Curry leaves Steps Step-by-Step Kanda Bachali Kura Recipe Guide Pressure cook the yam cubes with water and a pinch of turmeric until soft. Meanwhile, cook the chopped Malabar spinach separately until tender. Once done, drain the yam and mash it lightly. In a heavy-bottomed pan, combine the cooked spinach and mashed yam, then add tamarind pulp, salt, and jaggery. Let the mixture simmer on low heat for about five minutes so the flavors blend well. In the meantime, grind mustard seeds with green chilies to make a fresh paste. Turn off the heat and immediately mix in the mustard paste. Finally, prepare the tempering by heating oil and adding mustard seeds, urad dal, dried red chilies, and curry leaves until they splutter, then pour it over the curry and cover to lock in the aroma. About This dish is more than just a curry; it is a cultural icon of Andhra cuisine. Often called a “royal” preparation, it stands out for its layered flavors. The use of mustard paste, known as “Ava pettina kura,” is a signature Telugu cooking technique. It delivers a balanced experience of heat, tang, and mild sweetness while also being rich in fiber and nutrients. Tips Add the mustard paste only after turning off the stove to prevent bitterness. Use enough tamarind to neutralize the natural compounds in yam, ensuring a smooth eating experience. Jaggery helps balance the sharpness of mustard and enhances overall flavor. Serving it hot with steamed rice brings out its full traditional essence. Why Try This Recipe This recipe reflects the wisdom of traditional Indian cooking. The flavors are complex yet comforting, making it ideal for a family meal. It also offers a nutritious way to include greens in your diet. Preparing this dish is a great way to explore authentic regional cuisine while creating something truly satisfying.

Read More »

Rava Dosa

intro Welcome to the ultimate guide for a perfect South Indian breakfast. This Rava Dosa Recipe helps you make thin, lacy, and extremely crispy dosas in just a few minutes. Unlike traditional dosa, there is no need to ferment the batter overnight. It works perfectly for busy mornings or sudden hunger cravings. The texture of this crepe is unique and deeply satisfying for anyone who enjoys a good crunch. story Everyone loves a good crunch at the start of the day. Rava Dosa is a beloved staple in many Indian households because of its simplicity. It uses semolina (rava) and rice flour to create that signature net-like appearance. Historically, this version was developed to skip the long fermentation process of rice and lentils. Over time, it became a popular street food across India. Many families enjoy it with spicy coconut chutney or savory potato masala. The real secret lies in the batter consistency and pan temperature. When these are just right, the dosa turns perfectly crisp with beautiful lace-like holes. Ingredients Fine semolina (rava), rice flour, and all-purpose flour form the base of this recipe. Water is added to achieve a thin, flowing consistency. Cumin seeds, finely chopped ginger, green chilies, and torn curry leaves bring in aroma and flavor, while salt balances the taste. Oil or ghee is used for frying to get that crisp texture. Finely chopped onions can also be added optionally for extra flavor. preparation Start by mixing semolina, rice flour, and all-purpose flour in a bowl. Add cumin seeds, ginger, green chilies, curry leaves, and salt. Gradually pour in water while whisking to avoid lumps, keeping the batter thin like buttermilk. Let it rest for about 20 to 25 minutes, then adjust the consistency if needed. Heat a pan until very hot, stir the batter, and pour it from the edges toward the center without spreading. Drizzle oil or ghee, cook until golden and crisp, then lift and serve hot. about Mastering the Rava Dosa Recipe:This dish is a quick variation of the classic Indian crepe. Unlike traditional dosa, it uses simple pantry ingredients without soaking or grinding. The most important factor is the water-to-flour ratio. A thin batter creates the iconic holes and crispy texture, while a thick batter results in a soft dosa. Using a heavy pan ensures even heat distribution and prevents burning. Many prefer a cast-iron skillet for consistent results and better flavor. themes Pro Tips for the Perfect Crunch :Always ensure the pan is very hot before pouring the batter. A cold pan will cause sticking and ruin the texture. Stir the batter before each dosa since the flour settles at the bottom. You can sprinkle finely chopped onions on the pan for added flavor. Adding a little sour curd gives a mild tang, while ghee enhances aroma and richness. For extra spice, increase green chilies or add crushed black pepper. Why try You should try this Rava Dosa Recipe because it saves time without compromising on authentic taste. The crisp texture makes it a favorite for both kids and adults. It is light, easy to digest, and perfect for any time of the day. Start cooking and enjoy this crunchy delight with your family.

Read More »

Button Idly

intro The Button Idly Recipe is a delightful way to enjoy traditional South Indian cuisine in a bite-sized format. Furthermore, these tiny steamed rice cakes provide a healthy alternative to oily snacks for your family. Consequently, parents often prefer them for school lunch boxes because they are easy to pack. Because they are small, kids find them exciting and manageable to eat. Additionally, you can garnish them with various toppings like ghee or podi to add extra flavor. Therefore, this dish serves as a versatile option for any time of the day. story/description This dish originates from the heart of Southern India, where breakfast is a celebrated ritual. Traditionally, people use a fermented rice and lentil batter to create these soft gems. However, the unique appeal lies specifically in the special mini idly plates. Therefore, you need a specific mold to achieve that perfect, tiny button shape. Similarly, these idlies have gained massive popularity in modern urban cafes as ‘Ghee Podi Mini Idlies.’ Moreover, they represent a perfect blend of ancient tradition and modern convenience for busy mornings. ### Why You Will Love This Button Idly Recipe Besides being visually appealing, this recipe is incredibly light on the stomach. Specifically, the steaming process ensures that the nutrients remain intact without adding unnecessary fats. However, you must ensure your batter is well-fermented to get the best texture. Consequently, the air bubbles in the batter create that signature fluffiness we all love. Indeed, this dish remains a top choice for those who value health and taste equally. cast/ingredients To begin, you will need two cups of idly rice and half a cup of urad dal. Additionally, prepare a teaspoon of fenugreek seeds to aid fermentation. Furthermore, you will need salt to taste and water for grinding. Finally, keep some ghee and malgapodi (gunpowder) ready for the final seasoning.songs/steps 1. First, soak the rice and dal separately for at least five hours. 2. Second, grind them into a smooth batter and add salt. 3. Subsequently, allow the batter to ferment in a warm place for eight hours. 4. Therefore, ensure the batter rises well before you start cooking. 5. Next, grease your mini idly plates with a small amount of oil. 6. Consequently, pour one spoonful of batter into each tiny mold. 7. Finally, steam the plates for exactly five to seven minutes until they are firm yet soft. about The Button Idly Recipe is not just a meal; it is a nutritional powerhouse. Because the batter is fermented, it contains beneficial probiotics that support gut health. Furthermore, these idlies are gluten-free and low in calories, making them perfect for weight management. Specifically, the combination of rice and lentils provides a complete amino acid profile for vegetarians. Consequently, doctors often recommend idlies as a safe and healthy food for toddlers and elderly people. Mastering the Button Idly Recipe at Home Actually, the secret to the best idly lies in the consistency of the batter. If the batter is too thin, the idlies will become flat. However, if it is too thick, they might turn out hard. Therefore, you should aim for a dropping consistency that holds its shape. Moreover, always use a sharp spoon dipped in water to remove the idlies from the mold. Thus, you will keep the button shape perfectly intact and prevent any sticking. themes/tips Always use fresh batter for the best results. Moreover, adding a pinch of salt after fermentation helps preserve the taste. Similarly, you can add grated carrots or beetroot to the batter for a colorful twist. Consequently, this makes the meal even more nutritious for picky eaters. Finally, always serve them hot to enjoy the softest texture possible.whyWatch/whyTry You should try this recipe because it is fast, healthy, and incredibly fun to serve. Additionally, it offers a great way to introduce traditional flavors to your children. Furthermore, it is a mess-free snack that works perfectly for parties. Therefore, grab your mini idly stand and start cooking this delightful treat today!

Read More »

MLA Upma Pesarattu

intro Looking for a royal breakfast? The MLA Upma Pesarattu Recipe offers a delicious start to your morning. This dish comes from the heart of Andhra Pradesh. Therefore, it brings bold and traditional flavors to your dining table. Furthermore, people love its unique combination of textures. You get a crispy moong dal crepe on the outside and soft upma on the inside. Because of this balance, every bite feels like a celebration of South Indian culinary art.story People often call this dish the king of Telugu breakfast items. Legend says it became famous in the Andhra Pradesh Legislative Assembly canteen. Consequently, it gained the iconic ‘MLA’ name. In this dish, you find a protein-packed moong dal dosa. Additionally, the cook fills it with savory ginger, green chilies, and onions. This MLA Upma Pesarattu Recipe became a staple in many households over the decades. Because of its incredibly filling nature, it keeps you energized throughout the day. It represents a perfect blend of two beloved dishes: the Pesarattu and the Upma.cast 1 cup Green Gram (Moong Dal), 2 tablespoons Rice, 3 Green Chilies, 1 inch Ginger, Salt to taste, 1 cup Semolina (Upma Rawa), 2 cups Water, 1 Onion finely chopped, 2 tablespoons Ghee or Oil, 1 teaspoon Cumin seeds, Fresh coriander leaves.songs ### Making the Best MLA Upma Pesarattu Recipe First, soak the green gram and rice for five hours. After that, grind them into a smooth batter with ginger and chilies. Meanwhile, prepare a classic semolina upma in a separate pan. Make sure the upma remains soft and moist. Therefore, keep the water ratio correct. Next, heat a flat griddle and grease it lightly. Pour a ladle of batter and spread it into a thin circle. Sprinkle chopped onions and cumin seeds on top. Additionally, drizzle some ghee around the edges. Once the base turns golden and crispy, place a generous scoop of upma in the center. Finally, fold the dosa over the upma and serve it hot.about This dish is a nutritional powerhouse. The green gram provides high-quality plant protein. Similarly, the semolina offers the energy you need for a busy day. Many people enjoy it for brunch because it is so satisfying. It reflects the rich cultural heritage of the Telugu people. Therefore, it is more than just a meal; it is a culinary tradition.themes To get the best results, use fresh ginger in the batter. Moreover, do not skip the finely chopped onions on top. These onions add a necessary crunch that balances the soft upma filling. Additionally, always serve it with spicy ginger chutney. Similarly, coconut chutney or peanut chutney works well as a side dish. If you want a healthier version, you can use less oil. However, traditional versions use ghee to enhance the nutty flavor of the moong dal. Consequently, the aroma becomes absolutely irresistible for anyone in the kitchen.whyWatch You should try this recipe because it offers a complete, balanced meal in one plate. It combines proteins, fats, and carbohydrates perfectly. Furthermore, the combination of spicy ginger and earthy moong dal is unique. If you want to impress your family with a restaurant-style breakfast, this is your best choice. Therefore, start your morning with this nutritious and flavorful South Indian treat.

Read More »

Ulli Karam Dosa

intro First, you will love the vibrant flavors of this Ulli Karam Dosa Recipe. It combines the crunch of a fermented crepe with a fiery onion-garlic paste. Additionally, this dish represents the heart of Andhra’s culinary heritage. Therefore, anyone who enjoys bold spices should try this at home. However, you can easily adjust the heat to suit your personal preference.story/description The term ‘Ulli’ means onion, and ‘Karam’ refers to spice or chili. This recipe originates from the coastal regions of Andhra Pradesh. People there love food that wakes up the senses. Consequently, this dosa became a local favorite in street stalls and homes alike. Furthermore, the magic lies in the red chutney spread inside the dosa. Because the onions caramelize slightly on the hot griddle, they create a sweet yet spicy profile. This Ulli Karam Dosa Recipe transforms a simple breakfast into an extraordinary feast. Moreover, the aroma of fried garlic will fill your kitchen instantly.cast/ingredients 1. Dosa batter (fermented rice and lentil mix) 2. 2 large onions (roughly chopped) 3. 6-8 dried red chilies 4. 4 cloves of garlic 5. 1 small piece of tamarind 6. Salt (to taste) 7. Oil or Ghee (for roasting) 8. 1 teaspoon of cumin seedssongs/steps 1. First, prepare the spicy paste by blending onions, red chilies, garlic, tamarind, cumin, and salt into a smooth texture. 2. Next, heat a non-stick tawa or cast-iron griddle on a medium flame. 3. Pour a ladleful of dosa batter in the center and spread it in a thin, circular motion. 4. Drizzle some oil or ghee around the edges to make it crispy. 5. Then, take a spoonful of the prepared onion-chili paste and spread it evenly over the top of the dosa. 6. Cook the dosa until the bottom turns golden brown and the edges lift easily. 7. Finally, fold the dosa and serve it hot without flipping.about ## The Secret to a Perfect Ulli Karam Dosa Recipe To achieve the best results, you must focus on the consistency of your batter. A thin batter ensures a crispy base. Additionally, the quality of the dried red chilies determines the color of the Karam paste. If you use Kashmiri chilies, you get a bright red color without too much heat. However, spicy Guntur chilies provide that authentic kick. Furthermore, you should always use fresh garlic for the best aroma. Therefore, avoid using store-bought pastes for this specific Ulli Karam Dosa Recipe.themes/tips ## Making Your Own Ulli Karam Dosa Recipe at Home Always grease your pan properly before starting. You can use a sliced onion to rub the pan for a natural non-stick surface. Additionally, do not over-blend the Karam paste into a watery liquid; it should remain thick. Because a thick paste stays on the dosa better, it prevents the crepe from becoming soggy. Furthermore, you should cook the dosa on a medium flame. If the heat is too high, the paste might burn before the dosa gets crispy. Therefore, patience is the key ingredient here.whyWatch/whyTry You should try this recipe because it offers a restaurant-quality experience in your own kitchen. Additionally, it provides a healthy dose of probiotics from the fermented batter. Since you control the ingredients, you can make it as spicy or mild as you like. Moreover, it pairs perfectly with peanut chutney or a simple bowl of sambar. Finally, this dish will certainly impress your family during weekend brunches.

Read More »

Masala Dosa

intro The Masala Dosa Recipe brings the vibrant flavors of South India straight to your kitchen table. Furthermore, this dish combines a thin, crispy fermented crepe with a savory potato filling. Therefore, food enthusiasts worldwide cherish this meal for its unique texture and bold spices. Additionally, you can easily master this dish with the right techniques. Because it is highly nutritious, many families serve it for breakfast or dinner.story Masala Dosa originated in the historic streets of Karnataka many decades ago. Local chefs perfected the art of fermenting the batter over generations. Consequently, the dish became a staple in South Indian households. Initially, people ate plain dosas with simple chutneys. However, someone eventually added the spiced potato filling, creating the legendary Masala Dosa Recipe. Nowadays, you can find various versions of this recipe in every corner of the globe. It represents the rich heritage of Indian vegetarian cooking.cast 1. 2 cups of Sona Masuri rice. 2. 1/2 cup of Urad dal (black gram). 3. 1/4 teaspoon of Fenugreek seeds. 4. 4 large boiled potatoes. 5. 2 sliced onions. 6. 1 teaspoon of mustard seeds. 7. 2 green chilies. 8. A pinch of turmeric powder. 9. Salt to taste. 10. Ghee or oil for frying.songs ## Step-by-Step Masala Dosa Recipe Instructions First, soak the rice, dal, and fenugreek seeds for six hours. Subsequently, grind the mixture into a smooth batter and add salt. You must let the batter ferment overnight in a warm place. Next, mash the boiled potatoes for the filling. Sauté mustard seeds, onions, and chilies in a pan with some oil. Additionally, add turmeric and salt to the mashed potatoes and mix well. Heat a non-stick griddle and pour a ladle of batter. Spread the batter in a circular motion until it is very thin. Drizzle oil and cook until the bottom turns golden. Finally, place the potato filling in the center and fold the dosa carefully.about ## The Heritage of the Masala Dosa Recipe Moreover, the dish is more than just food; it is a cultural icon. Historically, the Tuluva community popularized this dish through their Udupi restaurants. Therefore, the recipe traveled across India and eventually reached international shores. Additionally, the fermentation process makes the dish very easy to digest. Consequently, health-conscious eaters often choose this recipe over other heavy breakfast options. Furthermore, the combination of carbohydrates and proteins provides a balanced start to your day. You will surely appreciate the depth of flavor that traditional methods provide.themes ## Pro Tips for Your Masala Dosa Recipe However, achieving the perfect crunch requires specific attention to detail. Initially, you should ensure your batter consistency is thin enough to pour. Furthermore, you must maintain a consistent heat on the griddle. If the pan becomes too hot, you should wipe it with a damp cloth immediately. Consequently, this lowers the temperature for the next crepe. Additionally, use a seasoned cast-iron skillet for the most authentic texture. Moreover, do not rush the fermentation process because time develops the flavor. Therefore, plan your preparation at least a day in advance for the best results.whyWatch You should try this recipe because it offers a restaurant-quality experience at home. Furthermore, the ingredients are simple and very affordable. Therefore, you can feed a large family without spending too much money. Additionally, the cooking process is incredibly rewarding and fun for beginners. You will love the satisfaction of peeling a perfectly crispy dosa off the pan!

Read More »

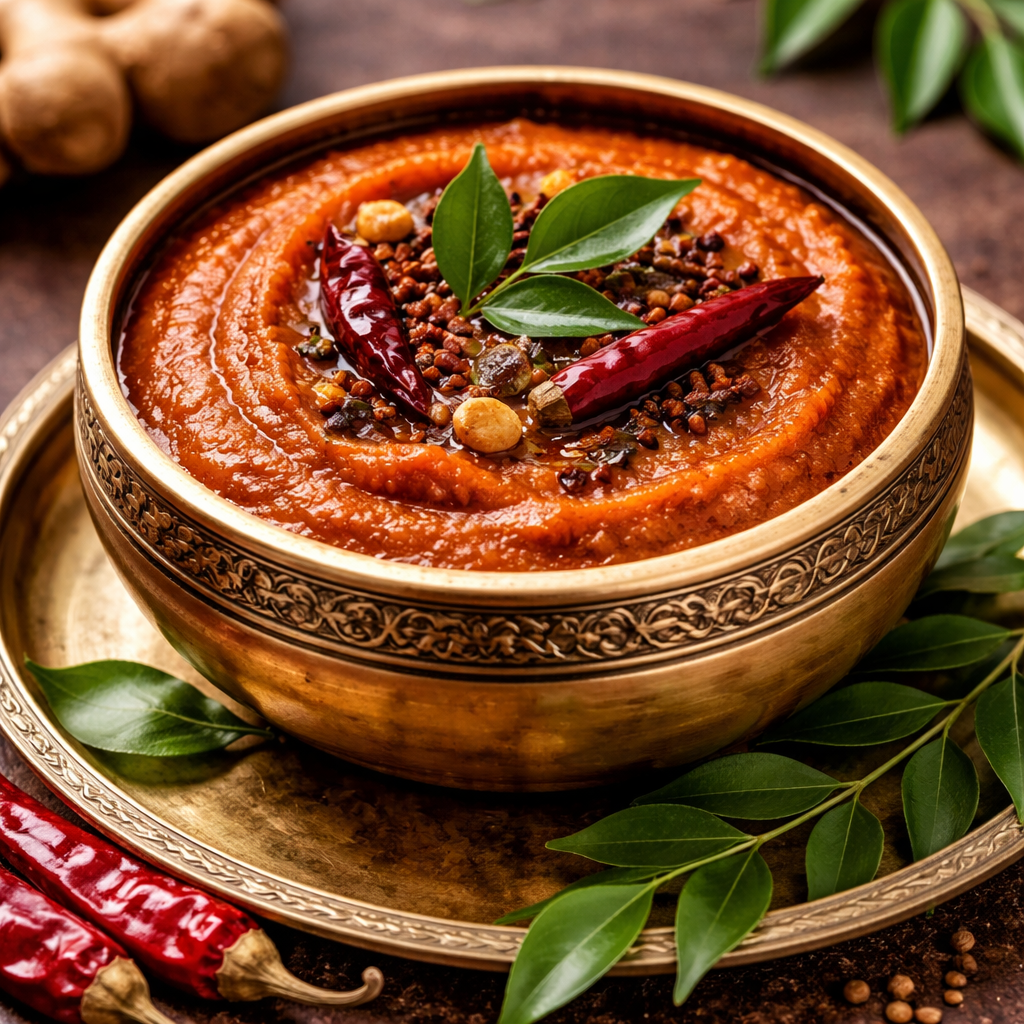
Curry Leaf Powder

intro Curry Leaf Powder brings a burst of traditional flavor to your modern kitchen. Many home cooks prefer making it fresh because store-bought versions often lose their aroma. Consequently, this vibrant green powder adds significant health benefits to every meal. Therefore, you should learn this simple method to elevate your daily cooking.story/description South Indian cooking relies heavily on these aromatic green leaves for their unique scent. However, fresh leaves do not last long in the refrigerator. Therefore, turning them into a dry spice mix is a practical solution. Additionally, the roasted lentils in this recipe provide a wonderful nutty texture. This Curry Leaf Powder Recipe transforms simple meals into gourmet experiences within seconds. Furthermore, the powder pairs perfectly with hot ghee and steamed rice. Because it is homemade, you control the spice level and salt content perfectly.cast/ingredients To begin, gather two cups of fresh curry leaves. You will also need two tablespoons of urad dal and one tablespoon of chana dal for texture. Additionally, prepare six to eight dried red chilies and one teaspoon of cumin seeds. Finally, include a pinch of asafoetida and salt to taste to balance the flavors.songs/steps First, wash the curry leaves thoroughly and pat them completely dry. Then, roast the leaves in a heavy-bottomed pan on low heat until they turn crisp. Furthermore, remove them and set them aside to cool. Next, roast the urad dal, chana dal, and red chilies until they become fragrant and golden. Additionally, add cumin and asafoetida during the last minute of roasting. Finally, let all ingredients cool completely before placing them in a blender. Grind the mixture into a fine or slightly coarse powder. Consequently, your aromatic spice blend is ready for storage.about This Curry Leaf Powder Recipe focuses on preserving the natural nutrients of the leaves. Since curry leaves contain high amounts of antioxidants, they are great for digestion and hair health. Moreover, the addition of roasted lentils provides a plant-based protein boost. Consequently, this powder is both a tasty condiment and a functional superfood.themes/tips Always use low heat while roasting the ingredients. Otherwise, you might burn the delicate leaves and ruin the flavor profile. Additionally, store the finished powder in an airtight glass jar. This ensures the aroma stays fresh for several weeks. Furthermore, you can add a few cloves of garlic during roasting for an extra savory punch.whyWatch/whyTry You should try this Curry Leaf Powder Recipe because it is incredibly versatile. For instance, it works as a delicious seasoning for popcorn, roasted vegetables, or salads. Additionally, it saves time on busy weeknights when you need a quick flavor boost. Therefore, it is a must-have staple for any health-conscious pantry.

Read More »
కావలసిన పదార్ధాలు
  • బాస్మతి బియ్యం Basmati Rice (washed and soaked) 1 cup
  • పాలకూర Spinach (tightly packed leaves) 2 cups
  • నెయ్యి Ghee (or oil) 2 టేబుల్ స్పూన్లు
  • ఉల్లిపాయ Onion (finely sliced) 1 మీడియం
  • అల్లం వెల్లుల్లి పేస్ట్ Ginger Garlic Paste 1 టీస్పూన్
  • పచ్చి మిరపకాయలు Green Chilies (adjust to spice level) 2
  • జీలకర్ర Cumin Seeds 1/2 టీస్పూన్
  • దాల్చిన చెక్క Cinnamon Stick 1 అంగుళం
  • లవంగాలు Cloves 2
  • యాలక Cardamom 1
  • ఉప్పు Salt (to taste) రుచికి సరిపడా
  • నీళ్ళు Water 1.5 cups
తయారి విధానం
  1. మొదట బాస్మతి బియ్యాన్ని కడిగి 20 నిమిషాల పాటు నానబెట్టుకోవాలి.
    Wash and soak the basmati rice in water for about 20 minutes.
  2. పాలకూరను శుభ్రంగా కడిగి, పచ్చిమిర్చి కలిపి మిక్సీలో వేసి మెత్తని పేస్ట్ లా చేసుకోవాలి.
    Clean the spinach leaves and blend them with green chilies into a smooth green paste.
  3. ప్రెషర్ కుక్కర్ లో నెయ్యి వేసి వేడి అయ్యాక దాల్చిన చెక్క, లవంగాలు, యాలకులు మరియు జీలకర్ర వేసి వేయించాలి.
    Heat ghee in a pressure cooker and add cinnamon, cloves, cardamom, and cumin seeds.
  4. ఇప్పుడు ఉల్లిపాయ ముక్కలు వేసి ఎర్రగా వేయించిన తర్వాత అల్లం వెల్లుల్లి పేస్ట్ వేసి పచ్చి వాసన పోయే వరకు వేయించాలి.
    Add sliced onions and sauté until they turn golden brown, then add ginger-garlic paste and sauté for a minute.
  5. తయారు చేసుకున్న పాలకూర పేస్ట్ వేసి 2 నిమిషాల పాటు తక్కువ మంట మీద ఉడికించాలి.
    Pour in the prepared spinach paste and cook on low heat for 2 minutes until the raw smell disappears.
  6. నానబెట్టిన బియ్యం, 1.5 కప్పుల నీళ్లు మరియు రుచికి సరిపడా ఉప్పు వేసి కలపాలి.
    Add the soaked rice, 1.5 cups of water, and salt as per your taste. Mix gently.
  7. కుక్కర్ మూత పెట్టి 2 విజిల్స్ వచ్చే వరకు ఉడికించి, ఆవిరి పోయాక వేడివేడిగా రైతాతో సర్వ్ చేయాలి.
    Close the lid and pressure cook for 2 whistles. Once the pressure settles, fluff the rice and serve hot with raita.
[real3dflipbook id='1']